|
Overview The LandVision™ Draw tool allows you to create Markups, and save them as Markup Layers in your Drawings folder. This can be useful for making maps such as marketing map brochures, map exhibits to reports, or submarket areas with properties of interest. Functionality of the “Draw tools” Icon in Toolbar 1) Create New Markup |
|
|
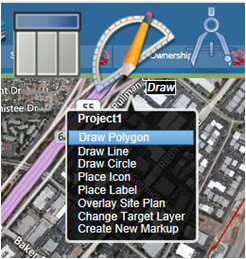
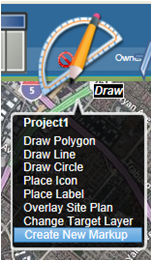
From the Toolbar, select the Draw tool. The text at the top of the drop down list will advise which Target Layer you are drawing in. Example of existing Markup (Project1 at the top of the list) Select Create New Markup on the drop down list. In the Create New Markup Layer window, select the folder where you would like to save the markup layer. The default is to save to your Drawings folder in which only you have access to view and edit. Name your new Markup Layer. (As examples, we will be working with the following layers: Project1, Project1a and Project 1b) We will name this new Markup Layer as Project1. 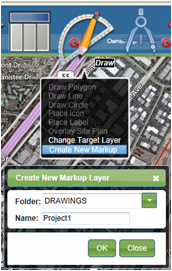 After selecting OK, you will be notified that the new Markup layer is complete. Click on the green check mark in the upper right corner to see the status of the task that was created. 
You can now see the new Markup layer in the Legend: 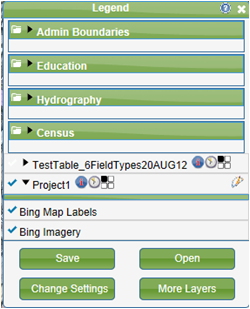
2) Create New Markup (to learn more about this feature click here) To edit a Markup Layer, click on the Draw tool on the Toolbar. Look at the top row of text in the drop down list. This is your current target markup layer. If this is not the correct layer that you want to edit, select Change Target Layer (to learn more about this feature click here). 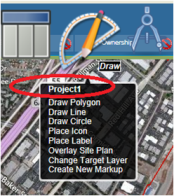 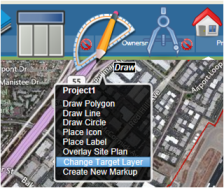
Select the Markup Layer that you want to edit and select OK. 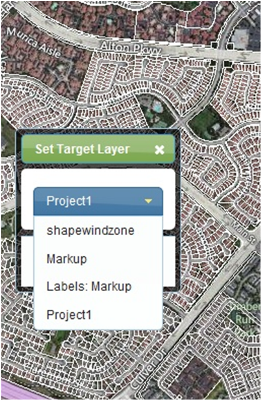 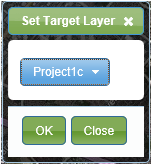 Also note that in the Legend, the Draw icon is displayed to the right of the current Target Layer. 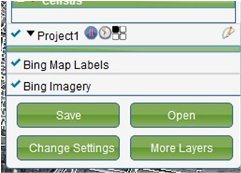
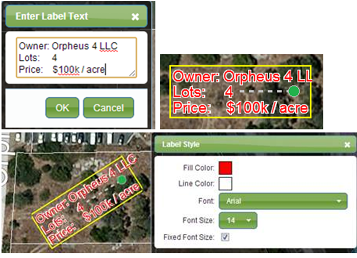
2) Draw a Polygon, Line and Circle Click the Draw tool on the Toolbar and select either draw a Polygon, Line or Circle. Select ‘Draw Circle ‘and Draw on the map. Once complete, the style window will appear providing you with options to change the style of the drawing. 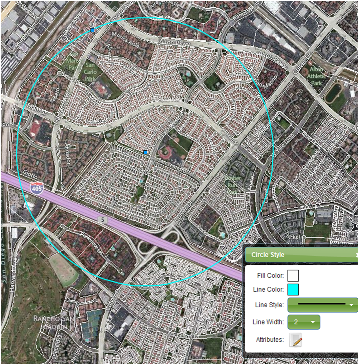 After the style has been updated, click on the Attributes icon to add Notes and a Label to your drawing. 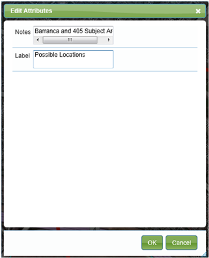 The information balloon will appear with your attributes. You can also place a label by selecting Place Label from the Draw tool Icon in the ToolBar. Enter Label text in the window and click OK. The Label will be “attached” to your mouse cursor. Click to place the Label on the map.
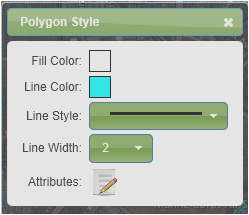
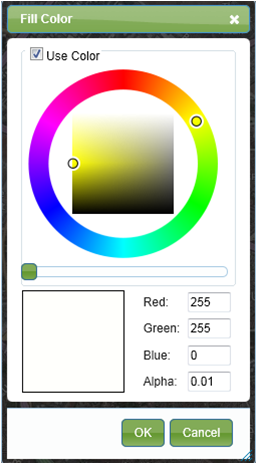
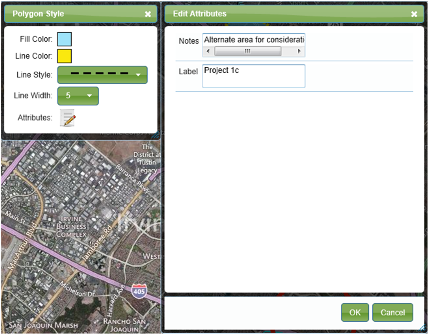
Users can add multiple lines of text and pivot the label once it is placed on the map. The Label Style window allows changing the colors, font style, font size and ability for user to select Fixed Font Size. Fixed Font Size retains the font size regardless of the zoom level. The green point allows you to pivot the label 360 degrees, which can be used to place street labels on the centerline of the street. 5) Place an Icon To create and place an icon on your Markup Drawing, select Place Icon from the Draw tool dropdown list in the Toolbar. An icon image appears allowing you to place the icon in the desired location. Click to place the icon on the map.  The Image Style window appears which allows to change the Fill color, Size of the Image and the Attributes of the icon image. Change Image Style When clicking on the Image field in the Image Style Window, there are several options to change the Image icon. Select one of the categories ‘Public’ Icon or ‘Custom’ Icons. You can choose an image which is available under the ‘Public’ Icons section or upload your own image like a ‘Starbucks’ icon or ‘Home Depot ‘ icon in the custom image section and then use anyone for your markup drawing. Note that you can rotate the image icon by grabbing the green dot next to the icon and while holding the left mouse click, drag the dot around to the direction of your choice. How to style the drawings (eg. polygon, line and circle) You can either click on the Draw icon in the Toolbar or you can click on the Draw icon in the Legend to select the type of markup you would like to draw. 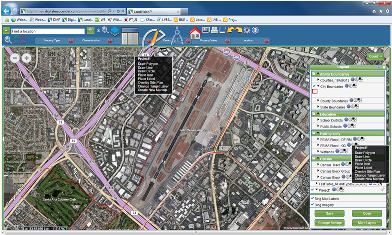 Select and click the desired option in the drop down list to draw on the map. (Double click to end the drawing). Once complete a Style window will appear providing you with options to edit your drawing. 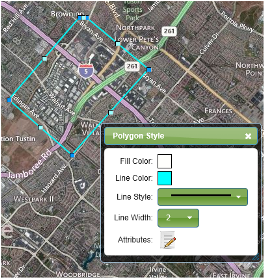 1. Fill Color – Select this option to change the fill color of your drawing. The Fill Color window will appear to make your edits.
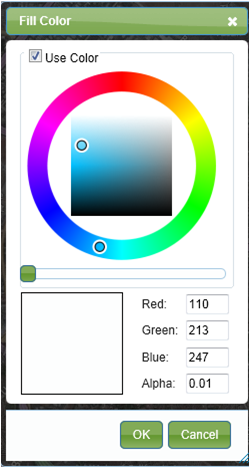 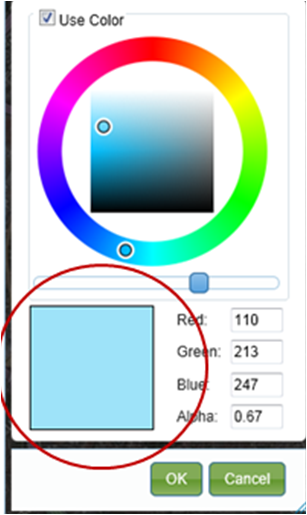 Now you can see the Fill Color changed on your Markup Drawing and the color has changed in the Style Box. 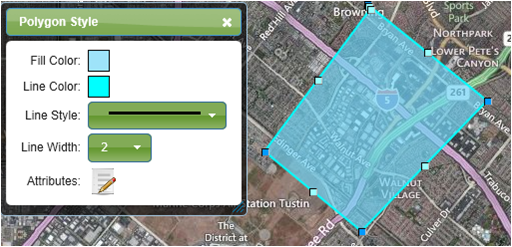 2. Line Color – Select this option to change the color of the line on your drawing. The Stroke Color will appear to change the colors. 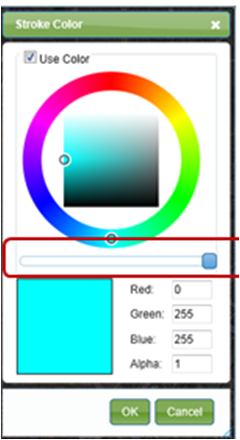 Steps to change the color of the Line:
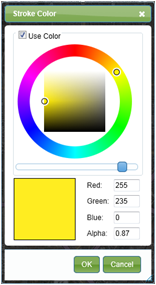 Now you see the Line Color changed in the Style Window and in your Markup Drawing. 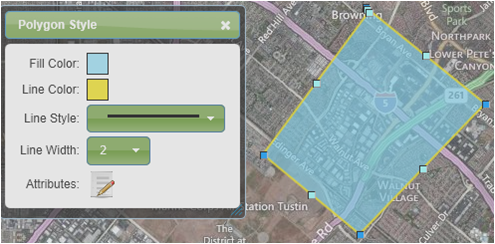 3. Line Style – Select and option in the drop down list to change the style of the line in your Markup Drawing 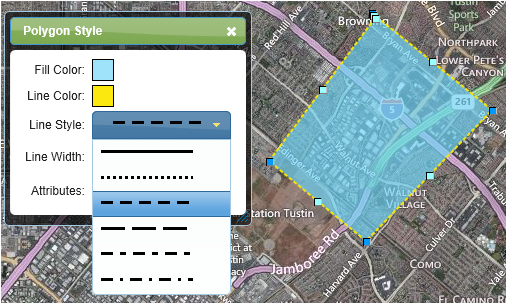 4. Line Width - Select the size of the width in the drop down list to make it larger or smaller in your drawing. 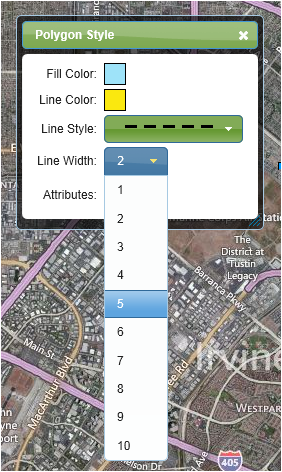 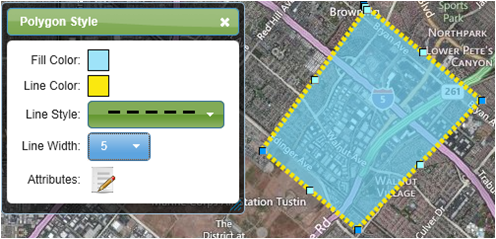 5. Attributes – Select Attributes and can add Notes and Label in the Markup Drawing. Enter the name of your Markup drawing in the Label box.
When you click on your Markup Drawing, you will now see the Notes and Label information you entered. 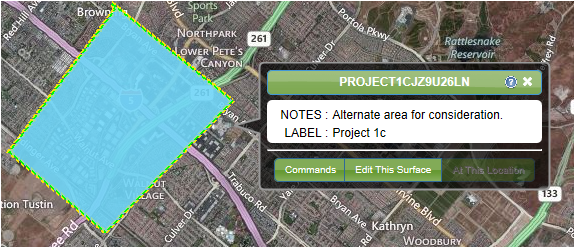 1) You can create an Overlay Site Plan via Draw tools Icon in Toolbar or a Draw tools icon beside a Markup layer. Click on Draw Tools Icon , Select Overlay Site Plan this should allow you to select an Image from ‘ Shared’ section or ‘ User’ Section. If there are images in the ‘Shared ‘ section or ‘User’ Section they will display or else you can upload a image from your desktop and Click ‘OK’. 2) This will now load the image on the screen and a Small wizard will appear on the right hand corner of the screen which will take you thru the steps of setting up an Overlay Site Plan. 3) Follow the instructions on the wizard. It says ‘Please select a point on the image’. Take your mouse to select a point on the image. 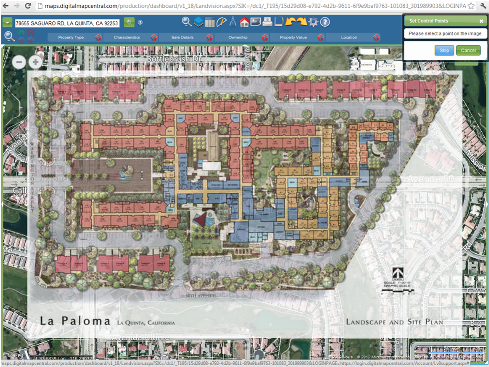 4) Now the instruction on the wizard says ’ Now select the corresponding point on the map’. Now take your mouse to point it at a location on the map. This will define the first control point of the image. 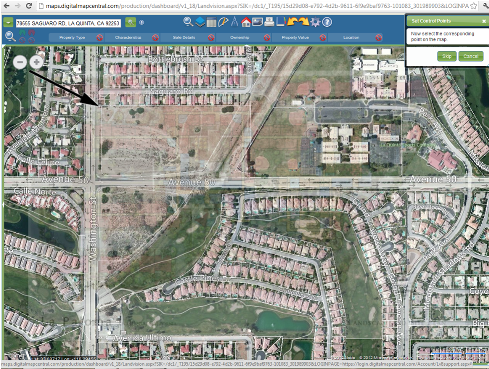 5) Now the instruction on the wizard says ‘Please select another point on the image’. Take your mouse and select another end point on the image. 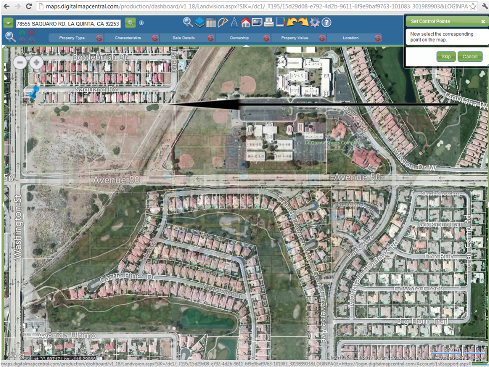 6) Now the instruction says ‘Please select a corresponding point on the map’. Now you place your mouse on the end point of the location where you want to place the image on the map. 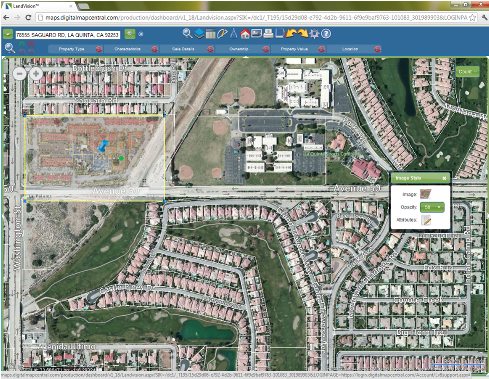 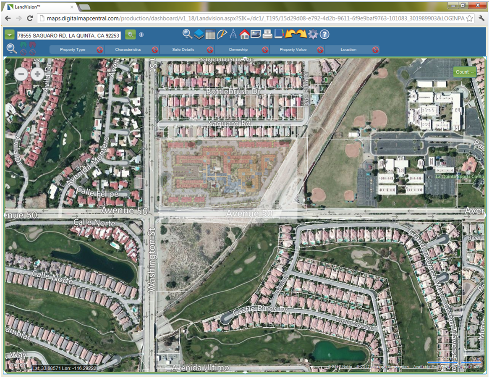 7) This will now place the image on the desired location. The Blue pin is the point where the image is placed. The Blue control points allow us to move it to a different location or to and resize the image at the same location. A small window also appears to change the image if we want to , change the opacity and add attributes like ‘Notes ‘ or ‘Label’ to the image. If you release the mouse from the screen the image is placed and the Overlay Site Plan is set on the map. 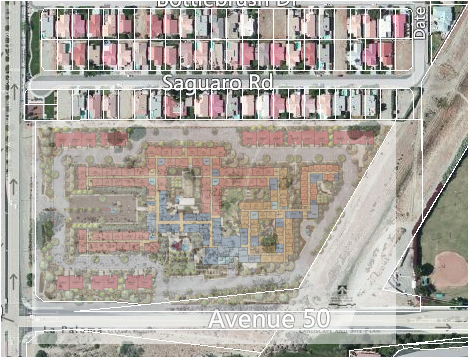 |