Opportunity Zones


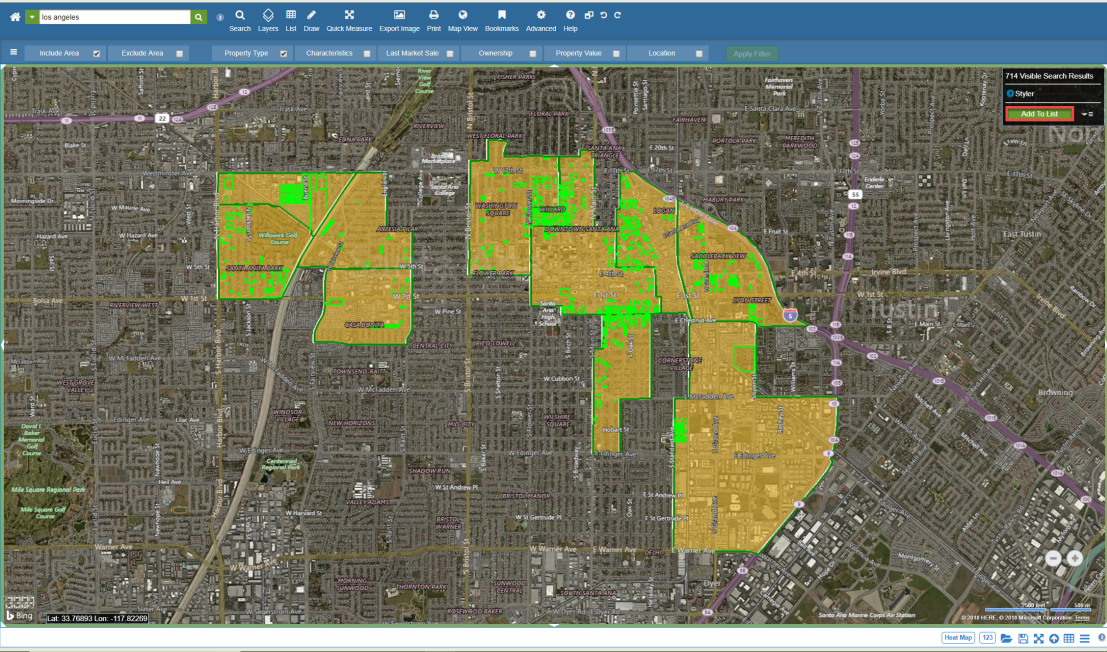
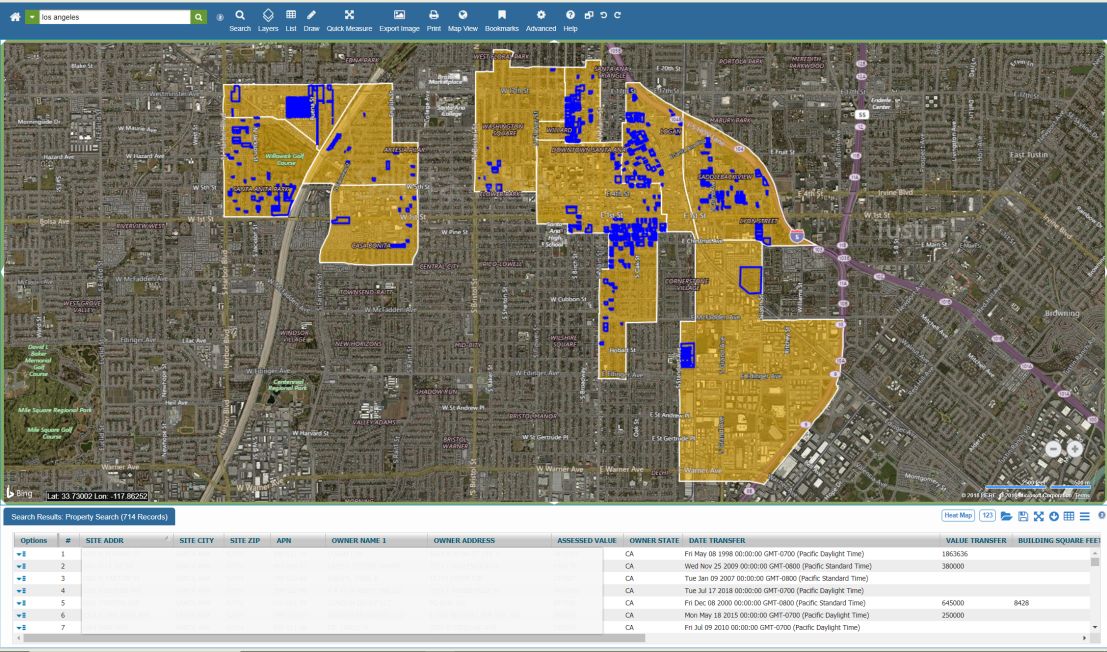
Searching for Properties within Opportunity Zones


The following documentation will guide users through the process of using Opportunity Zones to find properties. The search capabilities found in app will give the user the ability to reference CDFI data to find the parcels within a Low-Income Community and / or Non-LIC Contiguous zone.

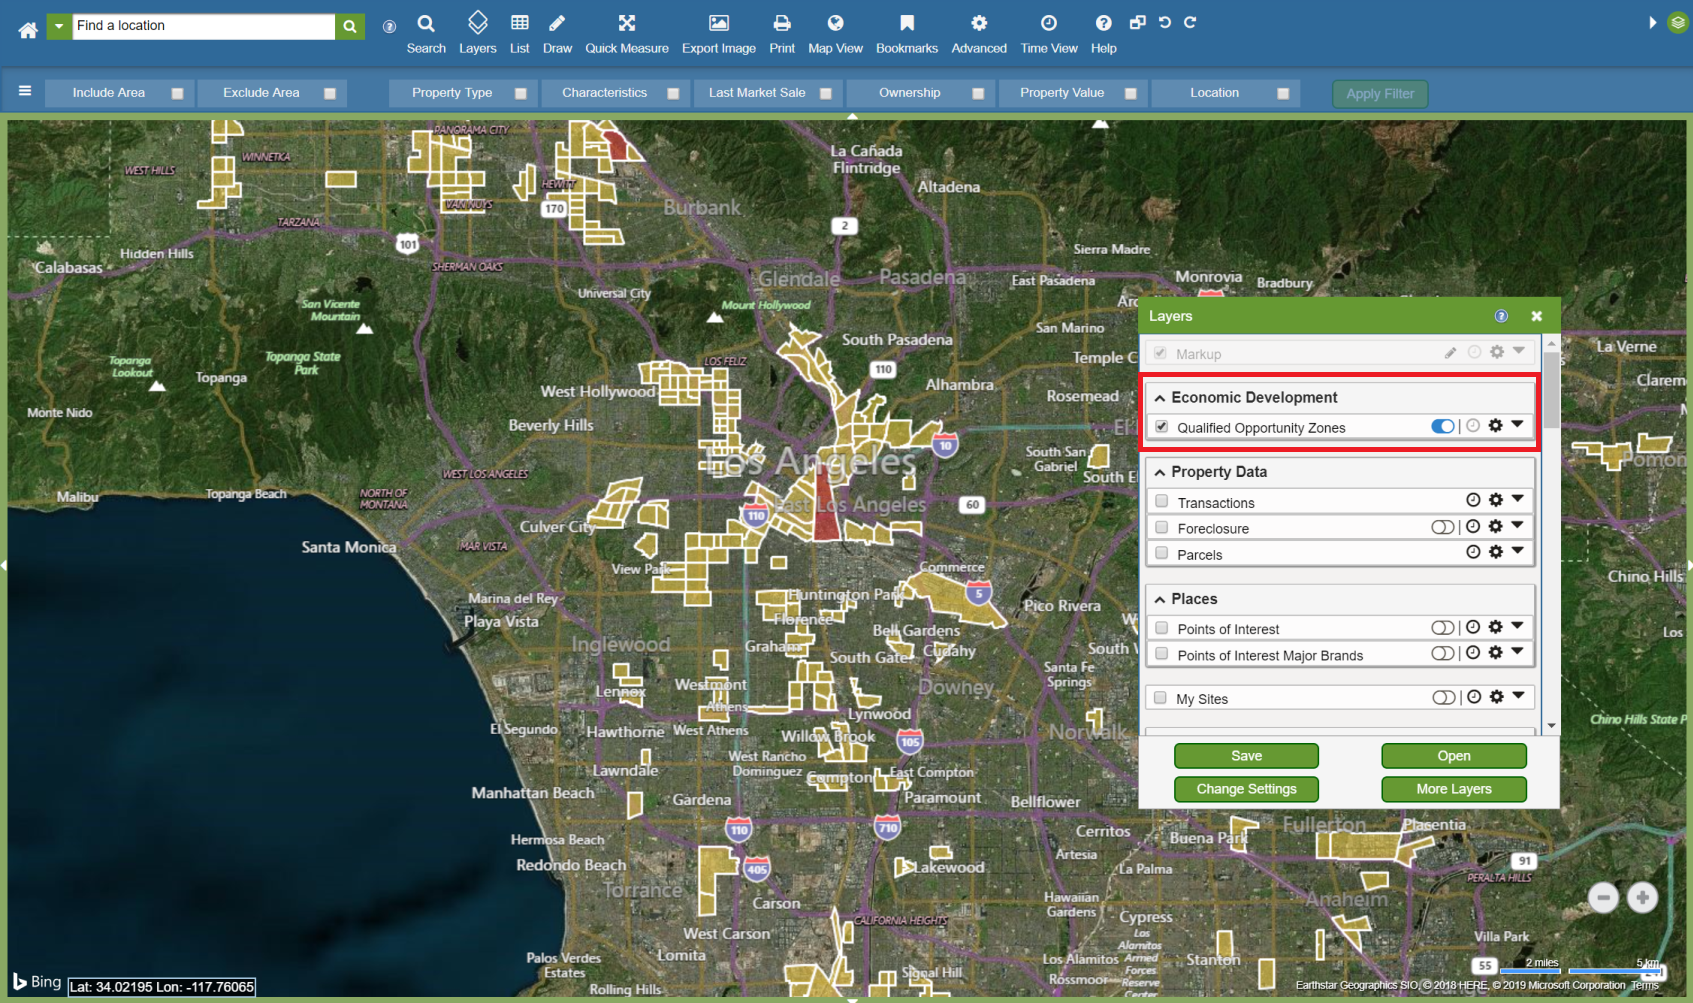
1. How to view the Opportunity Zone Layer


  1. Click the Layers Icon found on the main toolbar.

Layers Button
  1. Locate the Opportunity Zones | CDFI Layer found within the Economic Development group. Click on the checkbox to view the layer on the map.

Opportunity Zone Layer


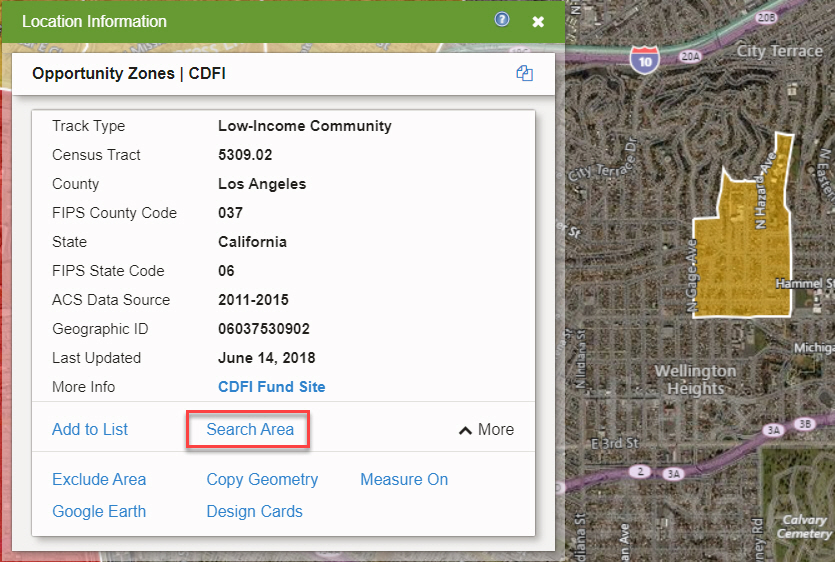
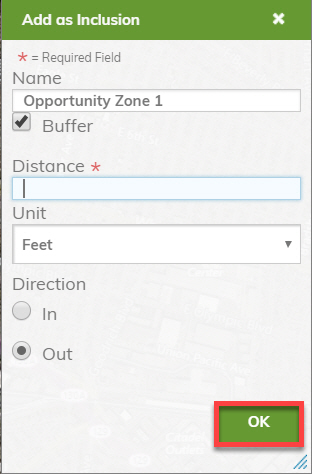
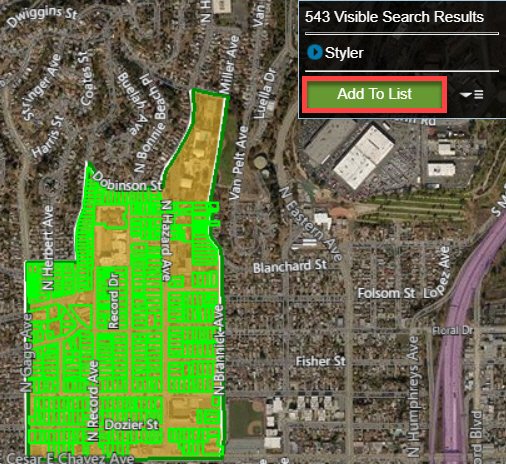
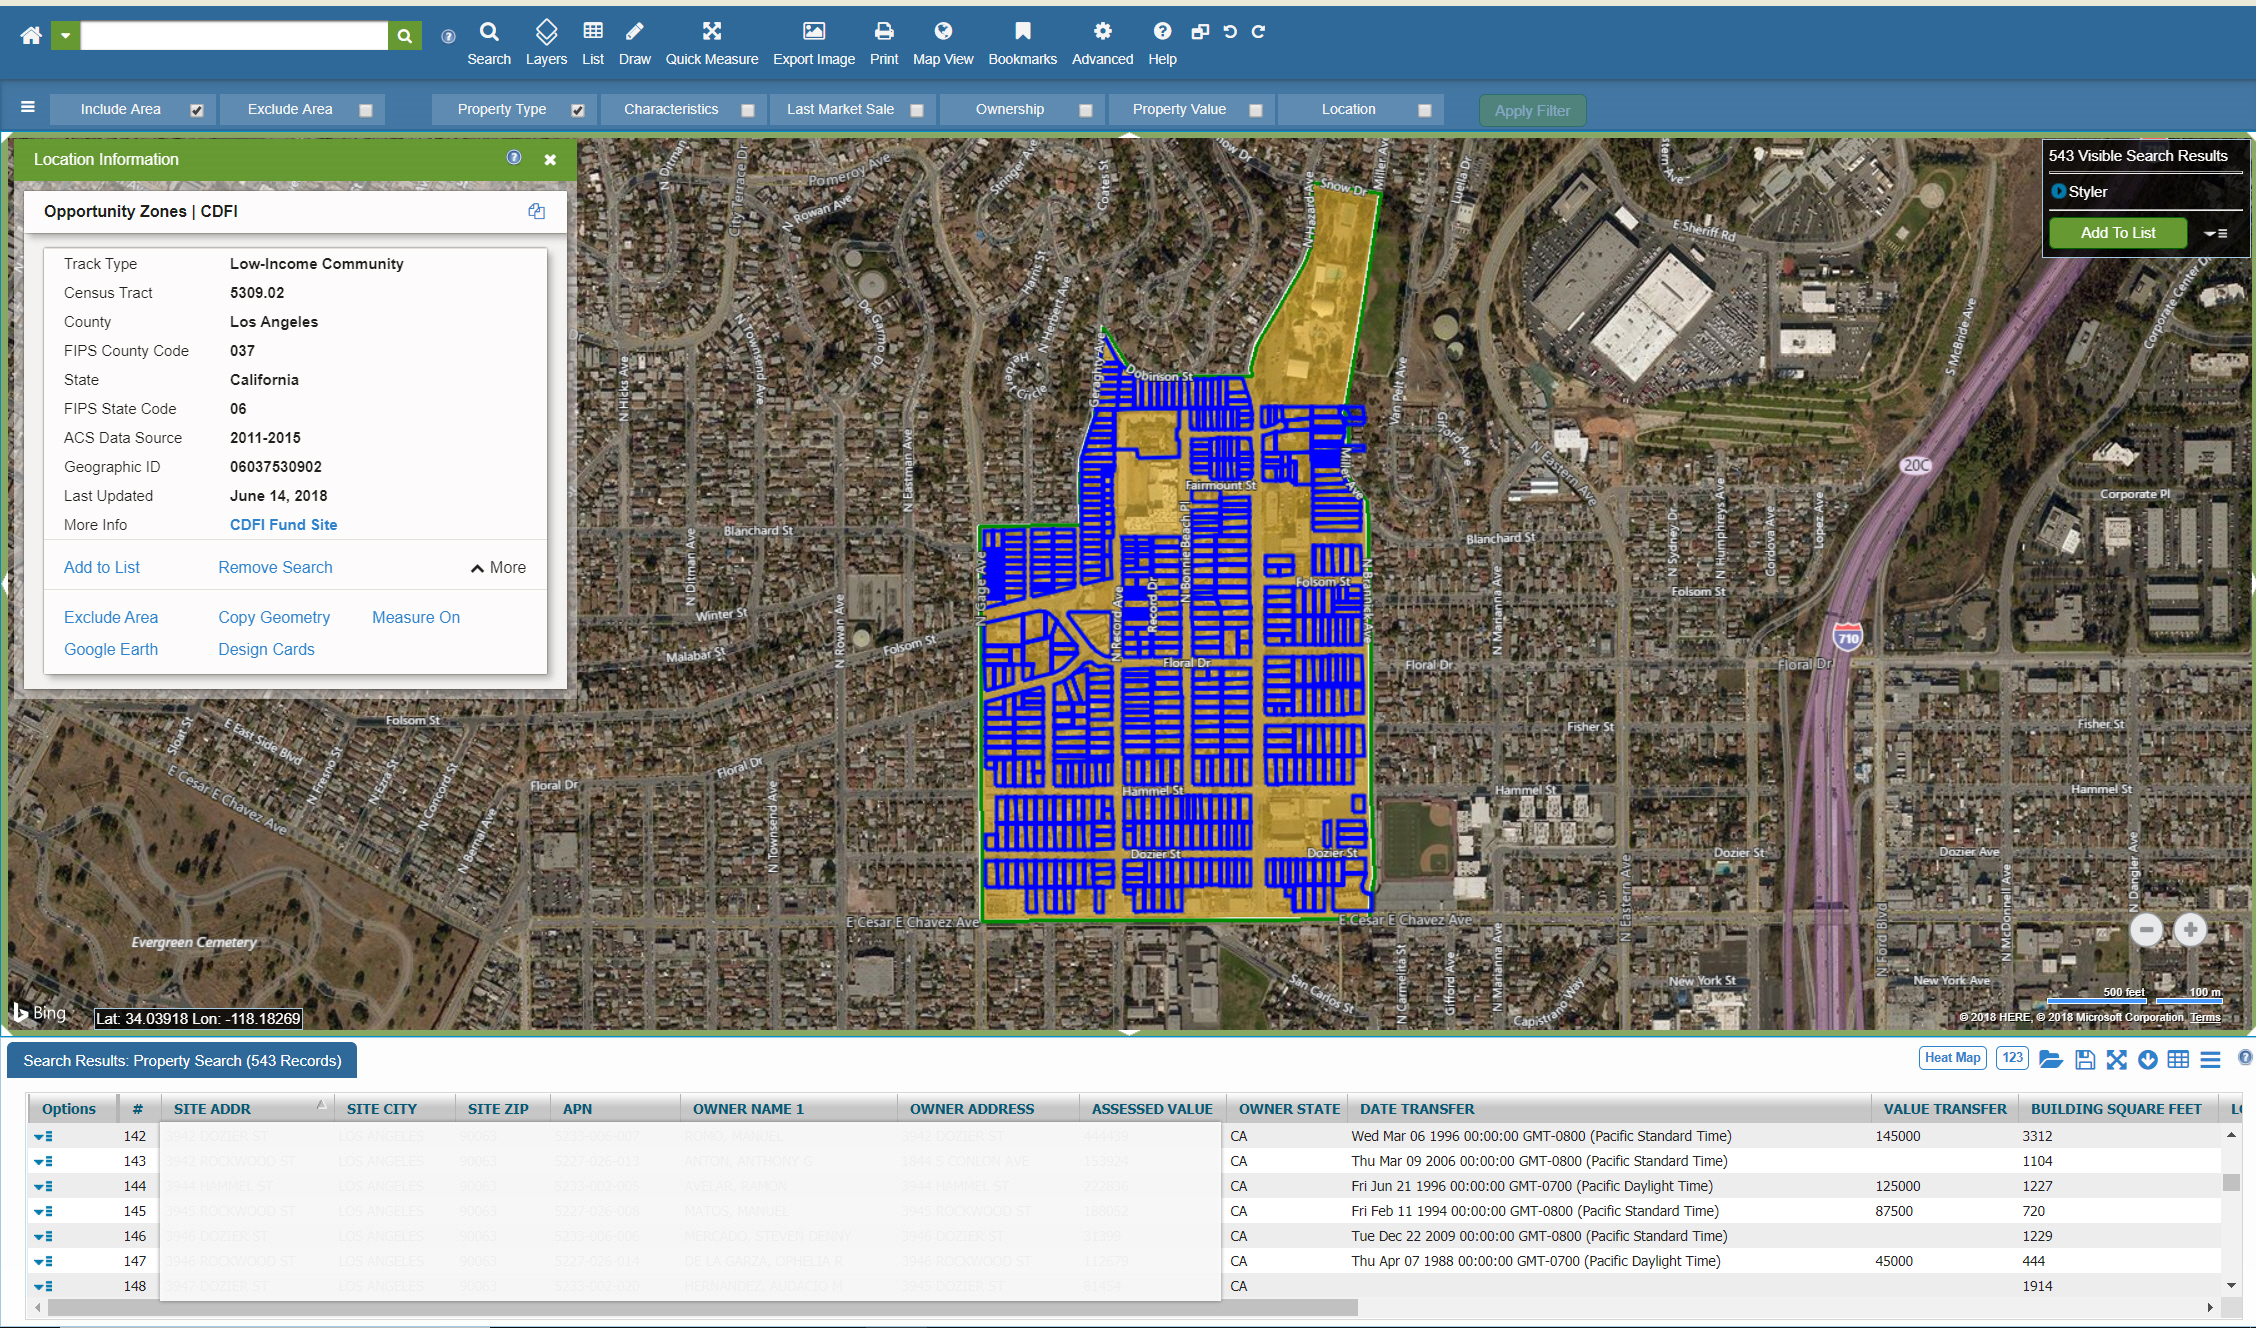
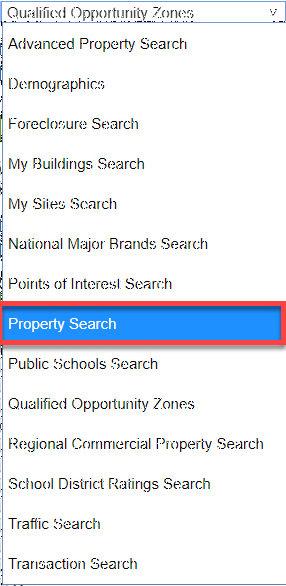
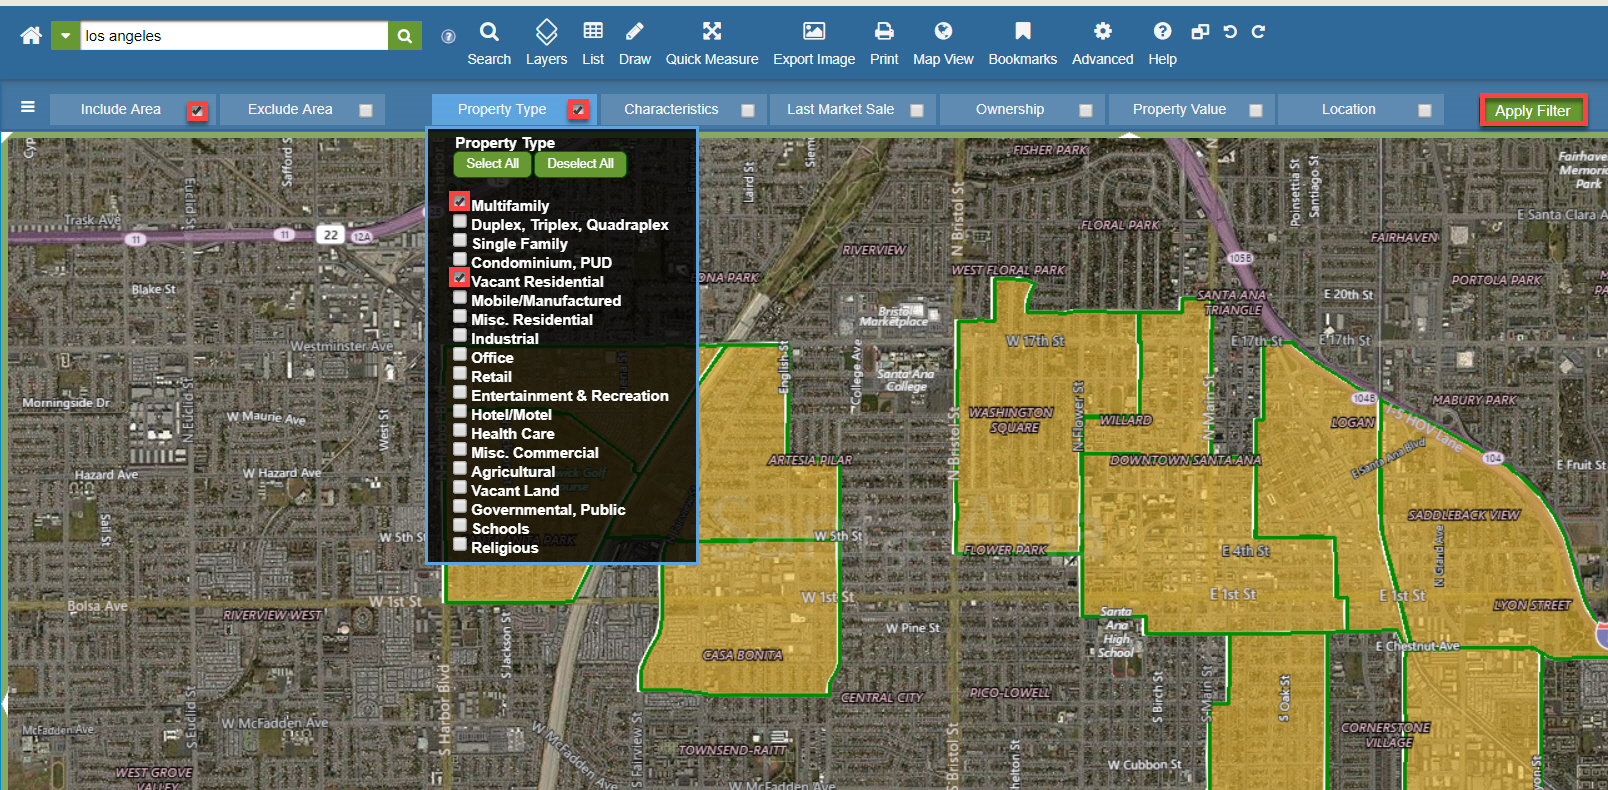
2. How to search for properties in a single Opportunity Zone


  1. Click on an Opportunity Zone.

  2. Select the Search Area command.

Search Area Command
  1. The Add as Inclusion settings window will appear.

    Name the Inclusion (optional), and set a buffer (optional)

  2. Click OK.

Search Area Command

  1. Click on the Search icon located on the main toolbar.

  2. Select the Search Form of your choice.

  3. Click OK
Folder path name
  1. Specify the criteria of your search and ensure filters that are to be used are set to "Active" by placing a check in the box next to them.

  2. Click the Apply Filter button.
Search Filters
  1. The properties will be highlighted on the map and may be added to a List, by clicking the Add To List button in the Visible Search Results window.

Add To List
  1. The list will appear on the bottom portion of the screen and will include all visible search results and the corresponding property data
Search Filters


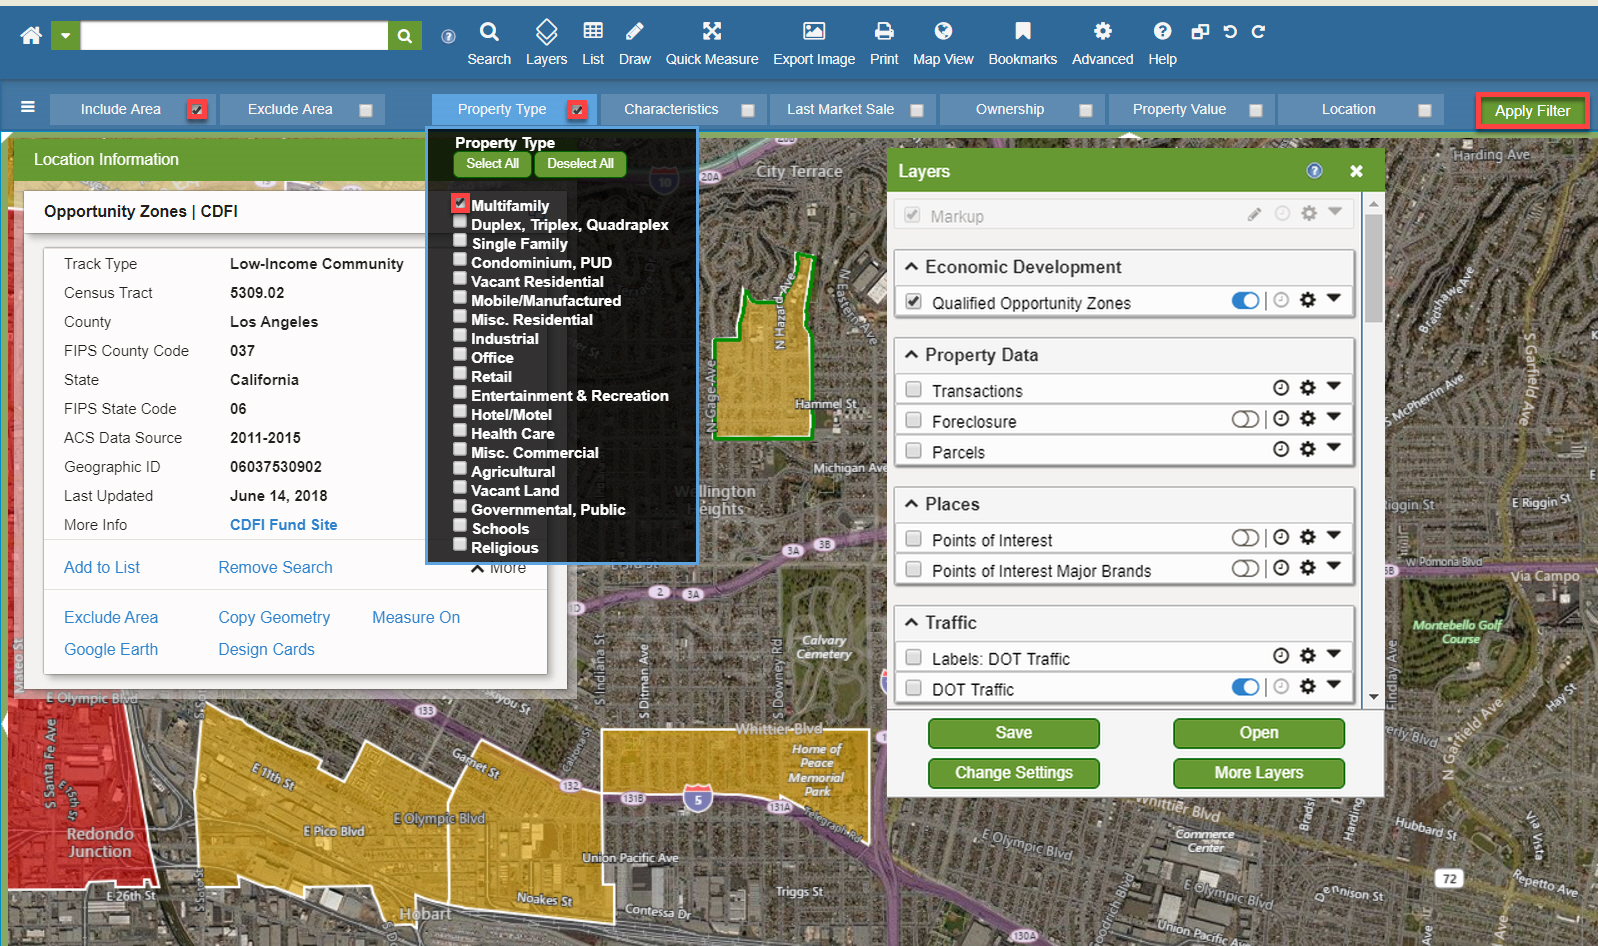
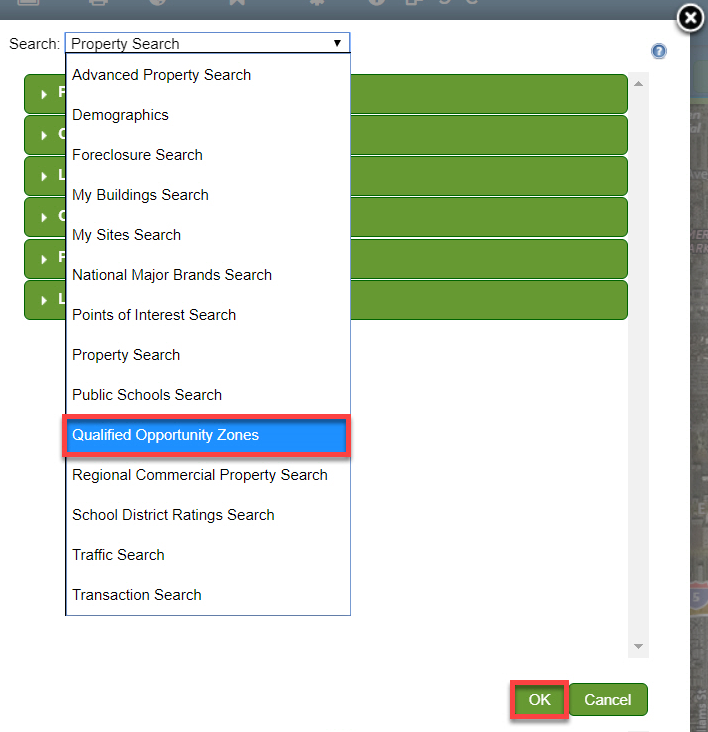
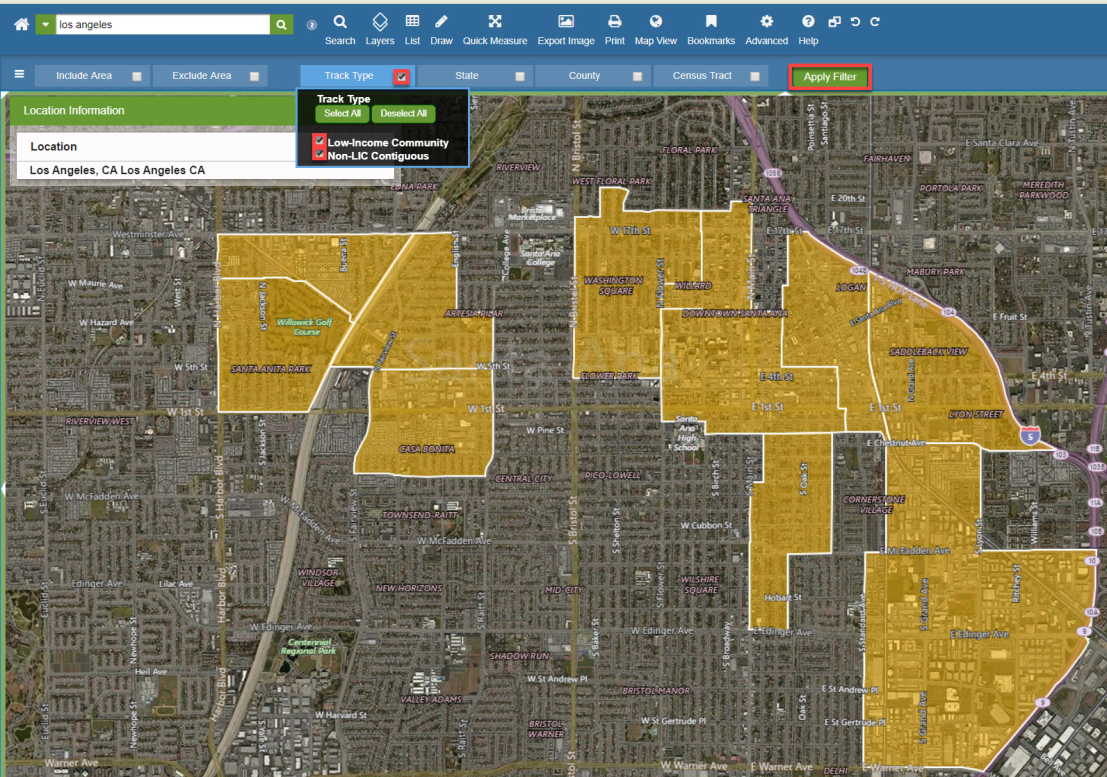
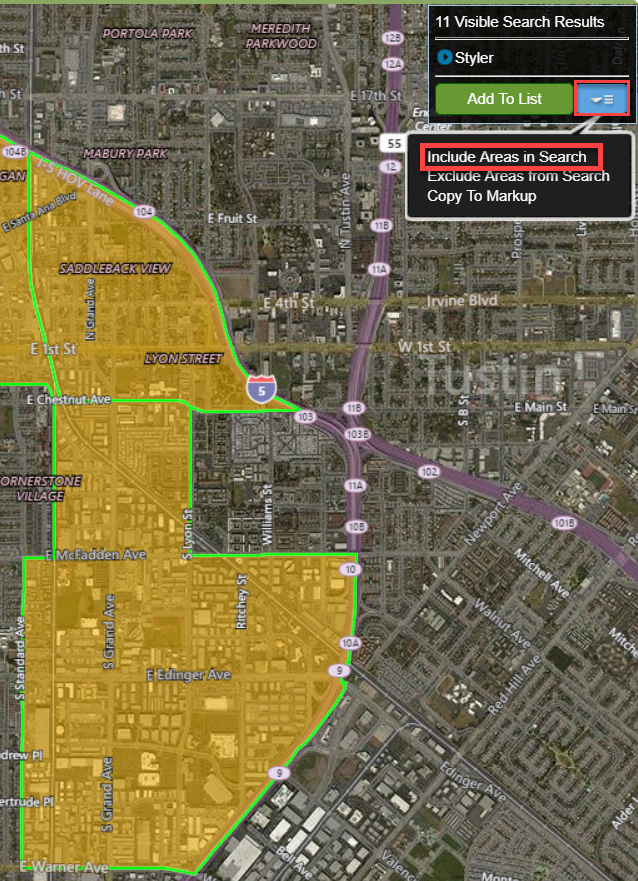
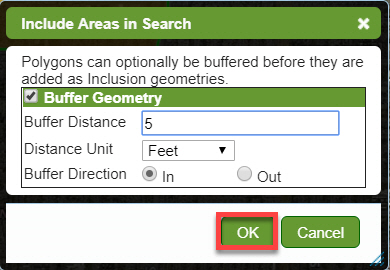
3. How to search for properties within multiple Opportunity Zones


  1. Click the Search icon located on the main tool bar.

  2. Choose the Qualified Opportunity Zones search form.

  3. Click OK

Search Filters
  1. Specify the criteria of your search and ensure filters that are to be used are set to "Active" by placing a check in the box next to them.

  2. Click the Apply Filter button.

Search Filters
  1. The qualified Opportunity Zones will be highlighted on the map. Click the Options icon located on the Visible Search Results display panel.

    Select the Include Areas in Search command.

Include Areas in Search
  1. The Include Areas in Search settings window will appear.

    Set the buffer
    (optional, but we advise that the user considers a buffer with a direction of In when he or she is interested in omitting properties that are found along the edge of the opportunity zones).

    Please note that there is a creation limit of 100 inclusion geometries when utilizing the Include Areas in Search feature.

  2. Click OK

Include Areas in Search
  1. Inclusion Geometries will be created for each of the Opportunity Zones returned during the initial search.

Include Areas in Search
  1. Click on the Search icon located on the main toolbar to begin the search for properties.

  2. Select the Search Form of your choice from the Search drop down menu.

  3. Click OK

Search Select
  1. Specify the criteria of your search and ensure filters that are to be used are set to "Active" by placing a check in the box next to them.

  2. Click Apply Filter

Include Areas in Search
  1. The properties will be highlighted on the map and may be added to a list by clicking the Add To List button.

Include Areas in Search
  1. The list will appear on the bottom portion of the screen and will include all visible search results and their corresponding property data.

Include Areas in Search

Return to Top

© Copyright 2018 Digital Map Products About DMP | Contact Us