|
LandVision™ Help > Documentation > Builder Target Sites
|
|
Learn how to create a project database using LandVision Builder Developer Edition with our Builder Target Site layers. Input information on sites, contacts and owners to view, search and report on.
|
Creating a Target Site
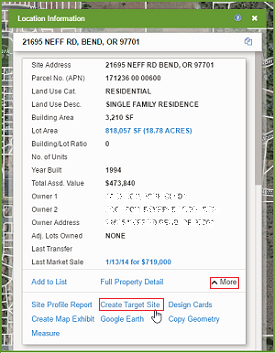
- Click on your desired Site on the map to identify it. The Location Information Panel appears.
- Click More on the summary card to expand the list of available commands.
- Click the Create Target Site command from the expanded list of commands.
|
|
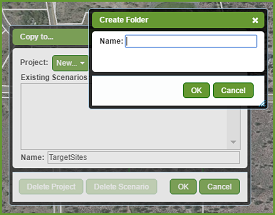
- Select the folder and project you would like to save your data to.
|
|
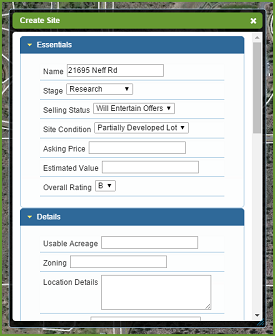
- Fill in your desired fields in the Edit Site window to record personal insights and your research data about the target site.
- When you've completed filling in the form, click OK at the bottom of the Edit Site window. Your Target Site is created, and a target sites layer will be placed in your Layers Panel.
|
|
|
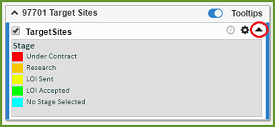
Note: The parcel will be shaded a color, based on the stage selected in the form. You can show the style in your layers to see a legend.
|
|
Viewing a Target Site
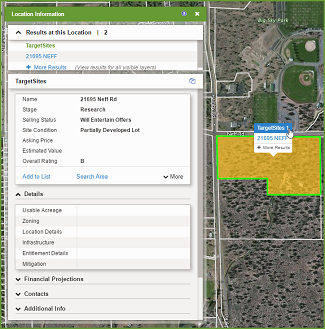
Here's how to view your Target Site information:
- Click on your desired Site on the map to identify it. The Location Information Panel appears. Select Target Sites from the Results at this location.
- Click the View link next to More info. The Target Site Info window appears.
|
|
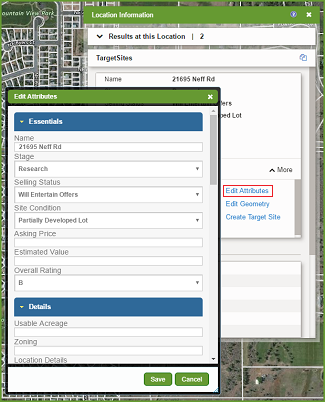
Here's how to edit your Target Site information:
- Click on your desired Site on the map to identify it. The Location Information Panel appears. Select Target Sites from the Results at this location.
- Click the more to expand the full list of commands
- Select the Edit Attributes command
- This will open the target sites form so you can add or edit the site details.
|
|
Related Information
|

