|
LandVision™ Help > Documentation > Defining Trade Areas
|
Trade Areas is a feature found in the Commercial Real Estate and Builder Developer Editions of LandVision™. Trade areas can be represented as either radii or drive time polygons, and can be organized into categories such as existing locations, competitor locations and collaborator locations.
Users can generate a single trade area from any point on the map, or multiple trade areas from a list of POIs.
|
Create a Trade Area from any Point
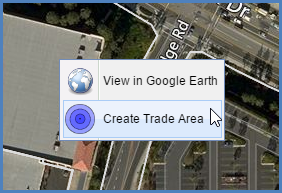
- Right Click on anywhere on the map where you would like to create a trade area from.
- Select the Create Trade Area option from the dropdown.
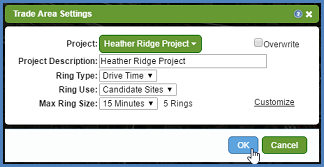
- In the Trade Area Settings window, entered the desired setting
- Select a project from the Project drop-down menu, or create a new Project
- Enter a Project Description (what will be displayed in the Legend)
- Choose the Ring Type (Radius or Drive Time)
- Choose the Ring Use (Competitors, Collaborators, Existing Sites, Candidate Sites)
- Select the Max Ring Size (Minutes for Drive Time, Miles for Radius)
- Keep the default** setting or click Customize to manually set the ring sizes and number of rings
Note: **The default setting creates 5 rings for Drive Time Ring Types, and 4 rings for Radius Ring Types. The size of the largest ring will be what's displayed in the dropdown menu, and each smaller ring will be incrementally smaller depending on the Ring Type. For example, if the Ring Type is Drive Time and the Max Ring Size is 15, then the tool will create 5 rings around a single site representing 15 min, 12 min, 9 min, 6 min, and 3 min.
- Once the settings are in place, click OK. The trade area will begin processing, as indicated by the processing icon
 in the notification center. in the notification center.
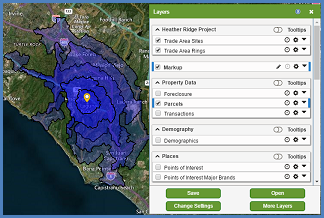
- Once complete, a notification pop-up will appear notifying you of the success of the trade area generation task. The Trade Area layer is created and will display on your map.
| 
|
Generate Trade Areas from a List of Points
|
You can generate multiple trade areas at once, from a list of points added to your results list. For example, you could do a search for Points of Interest (or any point layer), add them to the results list, and generate a trade area from each POI in the list.
Note: This will only work with point layers. Polygon, and Line layers will not have the option to Generate a Trade Area.
Search for POIs:
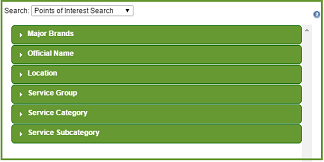
- Open the Points of Interest search form by clicking on the Search icon in the Main Toolbar
- Select Points of Interest search in the dropdown
- Enter the name of the point(s) of interest you want to generate trade areas for in the Official Name or Brand Name criteria groups or enter alternate criteria using the other fields available
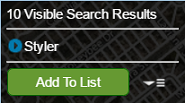
- Click OK to initiate the search and then view the search results on the map and note the number of results by viewing the results count in the upper right corner of the map
- Add additional criteria (including geographic criteria if desired) to get the desired results and then click Add To List in the results count window.
You can generate trade areas from any list of points in LandVision. So, in addition to searching for POIs you can search for other point layers as well. You could also open a custom point layer in your results list, and generate the trade area from those points. To open a point layer in your results list, select the Open icon  from the results list, then browse layers, and select the layer you would like to generate trade areas from. from the results list, then browse layers, and select the layer you would like to generate trade areas from.
| 
|
|
Once you have finished adding the points to your results list, you can follow the steps below to generate a trade area around each point.
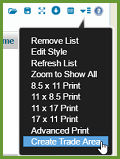
- Click the options icon in the top right corner of the Results List. Then, select the Create Trade Area option.
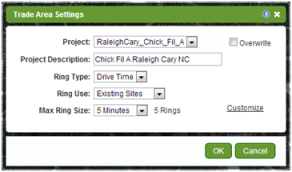
- In the Trade Area Settings window, entered the desired setting
- Select a project from the Project drop-down menu, or create a new Project
- Enter a Project Description (what will be displayed in the Legend)
- Choose the Ring Type (Radius or Drive Time)
- Choose the Ring Use (Competitors, Collaborators, Existing Sites, Candidate Sites)
- Select the Max Ring Size (Minutes for Drive Time, Miles for Radius)
- Keep the default** setting or click Customize to manually set the ring sizes and number of rings
|
Note: **The default setting creates 5 rings for Drive Time Ring Types, and 4 rings for Radius Ring Types. The size of the largest ring will be what's displayed in the dropdown menu, and each smaller ring will be incrementally smaller depending on the Ring Type. For example, if the Ring Type is Drive Time and the Max Ring Size is 15, then the tool will create 5 rings around a single site representing 15 min, 12 min, 9 min, 6 min, and 3 min.
- Once the settings are in place, click OK and then look at the notification area in the top right corner of the LandVision™ application window to see the trade area generation status
- Once complete, a notification pop-up will appear notifying you of the success of the trade area generation task
|

|
|
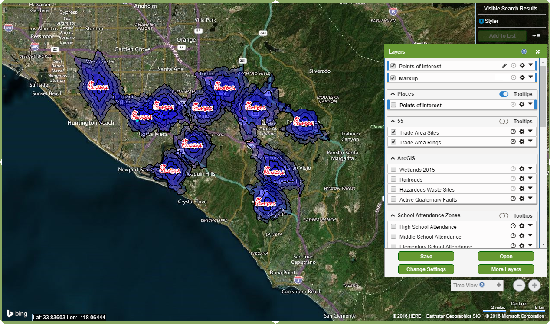
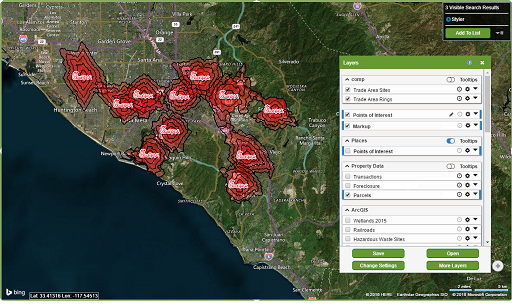
The map will now display trade areas around each of the POIs in the list based on the trade area settings.
|
|
|
To add more trade areas, such as competitor sites, simply follow the same steps but choose 'Competitors' in the drop down menu for Ring Use. The result will look something like the image below.
|
|
|
Creating a Trade Area from a Single POI
- Search for (as described above) or turn on and identify a Point of Interest (POI)
- To turn the layer on, open the Legend by clicking the Layers icon located on the Main Toolbar
- Identify the Points of Interest layer and check it on
- Toggle on the ability to Identify the layer by clicking the Tootips icon
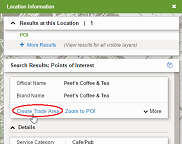
- In the POI information window, locate and click on the Generate Trade Area command
- Now follow the same steps as to create trade areas for multiple POIs
| 
|
Related Documents
|
