INCLUSION EXCLUSION SEARCH
|
LandVision Help > Documentation > Inclusion Exclusion |
|
Inclusion Geometries allow the user to define a custom search area. Draw the Polygon, Circle, and/or Line, and run a search filter to that specific area. Think of the Polygon Inclusion as a custom defined submarket search area. The Circle Inclusion can be used, for example, to look for comps around a subject property within a 1 mile radius. And the Line Inclusion can be used to search for properties on a particular street such as looking for freeway-frontage property, or properties along a rail line.
Exclusion Geometries will exclude the areas drawn while running a search filter. For example, a user might want to exclude a certain neighborhood, or exclude a 5 mile radius market area.
Search by Polygon Inclusion/Exclusion
|
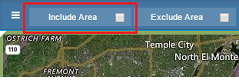
| 1) Click Include Area, or click Exclude Area to specify the type of inclusion/exclusion you would like to draw. |
|
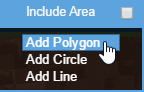
| 2) Select Add Polygon |
|
3) The mouse cursor will change to a cross-hair. Click once to begin the polygon drawing. Click again at each angle-point. Double-click to close out the polygon. |
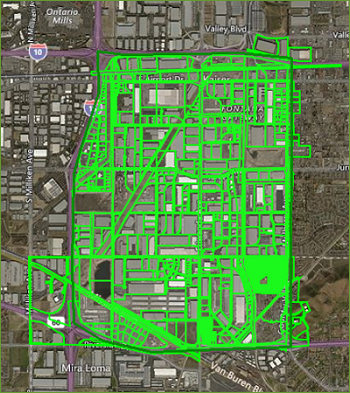
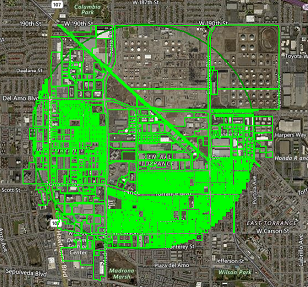
| 4) The area drawn, the Inclusion Polygon, will display with the selected properties. |
|
| 5) The Search Filter will now only focus the search to this area (and any additional Inclusion areas if active). If no Search Filter criteria is selected then all parcels will display highlighted and shown in the Count (Count is shown at top-right). |
Search by Circle Inclusion/Exclusion
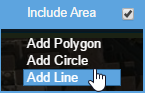
| 1) Click Include Area, or click Exclude Area to specify the type of inclusion/exclusion you would like to draw. |
|
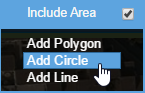
| 2) Select Add Circle |
|
| 3) Enter a name and Indicate the distance in the command prompt. |
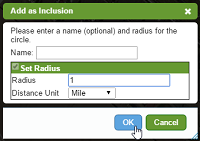
|
| 4) Click on the map to place the circle.
|
|
| 5) The area drawn, the Inclusion Circle, will display with selected properties. |
6) The Search Filter will now only focus the search to this area (and any additional Inclusion areas if active). If no Search Filter criteria is selected then all parcels will display highlighted and shown in the Count (Count is shown at top-right). |
To Search by Line Inclusion/Exclusion
| 1) Click on the Inclusion Area for an Inclusion Area. Click on the Exclusion Area for an Exclusion Area.
| |
| 2) Select Add Line |
 |
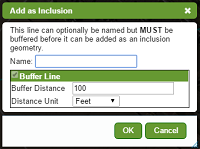
| 3) The mouse cursor will change to a cross-hair. Click once on the map to set the first point of the line (on a boulevard or rail line, for example) to begin the line drawing. Click again at each angle-point. Double-click to close out the line. |
| 4) For the Line Inclusion, the search will filter properties that touch the line and the Buffer Geometry. The user must set a Buffer Geometry, which will expand the search area outward from the line per the buffer distance specification and provide all properties that meet the filter criteria in the Count (Count is shown at top-right). |
 |
| 5) The line drawn, the Inclusion Line and Buffer, will display with the selected properties. |
| 6) The Search Filter will now only focus the search to this area (and any additional Inclusion areas if active). If no Search Filter criteria is selected then all parcels will display highlighted and shown in the Count (Count is shown at top-right). |
Edit the Inclusion/Exclusion Areas
| | 1) The filter is active when the checkbox is checked |
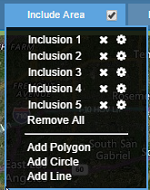 |
| 2) The filter is inactive if the checkbox is unchecked |
| 3) Click on Include Area or the Exclude Area to display the Inclusion / Exclusion menu and areas drawn |
|
4) The  icon allows you to delete the inclusion area icon allows you to delete the inclusion area |
|
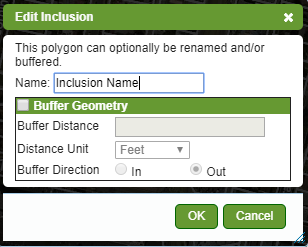
5) The Gear Icon  allows you to Edit the Inclusion/Exclusion allows you to Edit the Inclusion/Exclusion
- Edit the Name of the Inclusion / Exclusion
- Add/Edit a Buffer Geometry
- Set the buffer distanct/area to be inside or outside the selection
Note: Setting the buffer to "In" for the inclusion area, allows for improved searching for your target items.
For example: If you want to avoid selecting items that are just bordering, or slighting intersecting, your search area, while still selecting items that are further or completely inside your search area.
|
 |
Searching Inside/Outside a Feature
| |
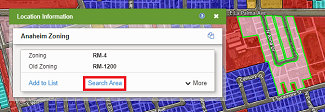
LandVision gives you the ability to search around or inside most features in LandVision (e.g. Parcels, Census Blocks, Zoning etc.). Read more to learn how to search inside or outside (around) a feature. |
- Identify the feature that you would like to search in or around.
- Select the Search Area command to search around or inside of the feature.
|
 |
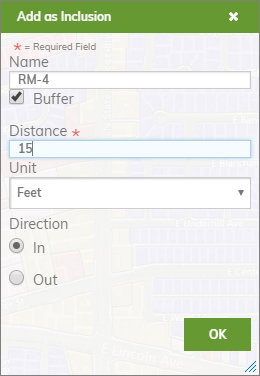
- The Add as Inclusion window will open where you can name your inclusion (area to search) and choose whether you want to buffer inside or outside of the feature.
- If you need to set a buffer inside or outside of the feature check the buffer box.
- Set your distance
- Choose your units (feet, meters, miles, kilometers)
- Choose the direction to buffer (inside or outside)
Note: Setting the buffer to "In" for the inclusion area, allows for improved searching for your target items.
For example: If you want to avoid selecting items that are just bordering, or slighting intersecting, your search area, while still selecting items that are further or completely inside your search area.
- Click OK and your Inclusion Area will be added to your search filter.
- Enter you search criteria and click Apply Filter to run your search.
|
 |
Related Documents
|
