|
The new formatting toolbar in LandVision™ offers greater drawing and markup options, while
simultaneously streamlining and standardizing the user interface.
With functionality more similar to popular office applications, users can more easily customize
LandVision™ with their visual information.
|
|
TO USE:
|
- General Tips
- The Formatting Toolbar is located below the map screen, under the Draw Toolbar. It is visible
when a markup is selected, including when a new markup is being created.

- The buttons on the toolbar will vary based on the type of markup selected (i.e. line,
polygon, circle, label, symbol).
- When you click on one of the formatting buttons, a selection box will appear above the button.
To close the selection box, click the "x" in the upper right corner of the box.
|
- Formatting Shapes
- If a polygon or circle markup is selected, the following toolbar will display .
|
- Click the paint can icon
 to change the fill color. to change the fill color.
- Select your fill color by clicking on the colored box of your choice from the palette, or click
the arrow at the lower right to view additional colors. A black border will highlight your
chosen color on the palette.
- To change the transparency of the fill color, click and drag the slider to the left (more
transparent) or right (less transparent).
|

|
|
|
- Formatting Lines
- If a line markup is selected, the following toolbar will display
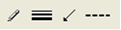
- Click on the arrow
 to modify the endpoint
style of your line. Select preferred endpoints by clicking on your choice from the selection
box. to modify the endpoint
style of your line. Select preferred endpoints by clicking on your choice from the selection
box.
- To modify a line’s color, thickness, or style, click on the appropriate button (functionality
described above in the formatting shapes section).
|
|
|
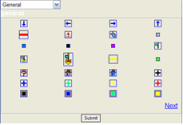
- Formatting Symbols
- If a symbol is selected, the toolbar will display the
 button. button.
- Clicking on the button will open a box
with symbol options. You can select your desired symbol from this set of options.
- NOTE: the most
recently selected icon for symbols becomes the default.
|
|
- Turning Shadows On & Off
- To toggle a line or shape’s shadow on or off, activate the markup by clicking on it.
- Right click and select “Toggle Shadow” to turn the shadow off (it is on by default).
- Follow this same procedure to turn the shadow back on.
|


 to change the line color of your
shape. Follow the same procedure for selecting colors as outlined above for fill color.
to change the line color of your
shape. Follow the same procedure for selecting colors as outlined above for fill color.
 to change the line thickness.
Choose desired line thickness from the selection box.
to change the line thickness.
Choose desired line thickness from the selection box.
 to change the line style. Select either
solid or dashed by clicking on the style of your choice.
to change the line style. Select either
solid or dashed by clicking on the style of your choice.

 to change the font color.
 to decrease the font size by two
points. Font size cannot go smaller than 2 points.
to decrease the font size by two
points. Font size cannot go smaller than 2 points.
 to increase the font size by two
points. There is no maximum font size.
to increase the font size by two
points. There is no maximum font size.
 to change the font properties. A
window will open displaying dropdown menus for text alignment, font style, font size, and font
family. Simply select the desired values from the dropdown lists to change them.
to change the font properties. A
window will open displaying dropdown menus for text alignment, font style, font size, and font
family. Simply select the desired values from the dropdown lists to change them.