|
GovClarity® Help > Documentation > Account Configuration
|
|
The GovClarity® product is pre-configured around local government best practices and will meet the majority of needs of most agencies out of the box. To meet agencies' unique needs, GovClarity is designed to offer a large amount of flexibility and customization. In fact, it is a recommended best practice to utilize the customization options outlined below to ensure your agency is getting maximum value from GovClarity. This document is intended to "pull it all together" into a concise, workflow-based process to help your agency maximize the functionality of GovClarity.
|
Account Administration Overview
GovClarity is designed to allow all users the ability to customize their individual user experience, but the ability to modify the entire account settings is controlled by Admin access only. There are three different levels of users in GovClarity: Account Liaison, Admin and User. These users then have access to specific folders within the application based on their level. The key folders within GovClarity are:
- User - each user has the ability to modify and customize their GovClarity experience by saving and accessing data from the User folder. Every user has read/write access to their individual user folder.
- Production - only Admins have the ability to view, edit and load data to the Production folder. But an Admin can grant the ability to edit and load data to individual users or groups. All users can view data in the Production folder.
- Share - With permission from an Admin, users can save data, styles, Map Themes, and other information to the Share folder for others with access to access and view.
- Group - With permission from an Admin, users part of a specific group (eg. Planning Group) can all save and edit data within this folder.
- *CommunityView™ - Only Admins have the ability to view, edit and load data to this folder. But an Admin can grant the ability to edit and load data to individual users or groups.
*Note: Only accounts that subscribe to the CommunityView™ module will have access to this folder.
The table below summarizes Admin and Account Liaison access controls:
|
| User Type |
Read/Write Data to Production folder |
Grant User or Group Sharing Access |
Load Data to Production Folder |
Add/Delete Users |
Grant User or Group Access |
Create Admin Users |
| Account Liaison |
 |
|
|
|
|
|
| Admin |
|
|
|
|
|
|
Account Administration
|
The following documentation summarizes how the Account Liaison and Admin can control user permissions, folder access, user passwords and adding or deleting users.
|
Loading Data
Adding agency specific data is an easy process through the built-in Data Loader tool. The process for loading data and creating layers is outlined in the tutorials below.
Create Layer
|
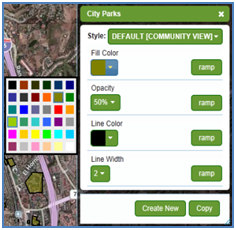
Style and Label Data
Editing the look and feel of data in GovClarity helps the user understand the presented information and can either significantly enhance users' ability to make decisions. Therefore, it is recommended that the person loading data, or someone familiar with the dataset, take the necessary time to style the data and create labels. The following link provides documentation on the wide variety of tools in GovClarity dedicated to improving data visualization.
|
Setting up Map Themes
The creation of individual Map Themes help improve the efficiency and visualization of data for users by only including map layers and styles relevant to the selected Map Theme (eg. Zoning Map or Parks and Recreation Map Themes).
Users have many options for editing the look and feel of the data that is displayed in each Map Theme. Each individual Map Theme can have its own unique set of layers, styles, order, controls, and features.
- Click on the Open button and from the drop down list, choose the PRODUCTION folder, and then select the "Home" Map Theme.
- This now opens up the list of layers that are currently displayed in the "Home" Map Theme.
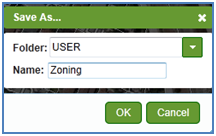
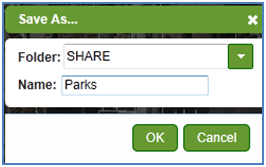
- Next, click on the Save button in the legend and save this Map Theme as "Parks" in the USER folder (Let's assume for this
example we are working on creating a Parks Map Theme).
Tip: Saving the Map Theme to your USER folder allows you to make edits and changes to the Map Theme and get any final approval before sharing this information to all users in the PRODUCTION folder.
|
|
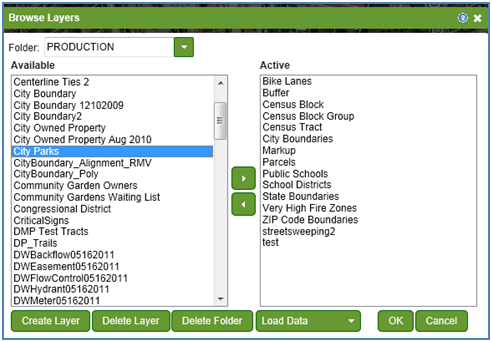
- To add any of the layers that are loaded to the PRODUCTION folder, click the More Layers button, navigate to the PRODUCTION folder and move the layers from the Available folder to the Active folder.
Find the layer and use the arrow  to move the layer from the Available folder to the Active folder. Then click OK. to move the layer from the Available folder to the Active folder. Then click OK.
The new layer is now in your Legend.
|
|
With all layers now added to the Parks Map Theme, we can begin grouping the layers and setting the view status.
- Click on the Options icon
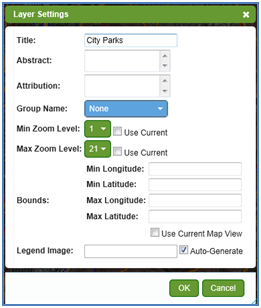
 to the right of any layer in the Legend and choose Layer Properties. to the right of any layer in the Legend and choose Layer Properties.
- From this window you can modify numerous items.
- Change the name of the layer
- "Group" Layers and create "New" Groups.
- Add notes or information about the currency of the data or who loaded the layer.
- Define when the zoom level, or the level when a layer is turned on or off.
- Make the appropriate adjustments to each layer.
Tip: GovClarity also allows you to define whether a layer is automatically "On" or "Off" when the Map Theme is loaded as well as whether tooltips are on are off for a group.
|
|
- Additionally, if the layer is checked "On" in the Map, it will be "On" when a user opens the Map Theme as well.
- Center the map and adjust the zoom level. What you see on your map in GovClarity, will be what the user sees when they open up the Map Theme.
- When you are satisfied with all of the settings, click the Save button to register all the updates and changes made to the Parks Map Theme to your USER Folder.
Tip: GovClarity utilizes Autosave functionality. When a user closes out of GovClarity and logs back into the application. They are zoomed into the same area they left, including the same Map Theme.
- At this point in the workflow, you could Share this Map Theme with another user for approval or you could Save this Map Theme to the Production Folder where anyone in the agency will have access.
|
- Here is how you would Share the Map Theme
- Save the Map Theme to the Share folder.
- Instruct the other user to click the Open button, and then navigate to the Share folder where the file you saved is located.
- The other user can make additional changes to the Map Theme and either overwrite the changes or save them with a different name
- The Map Theme is now ready to be saved to the PRODUCTION folder.
- To save the Map Theme directly to the PRODUCTION folder,
- Click the Save button and choose from the PRODUCTION folder
- Name the Map Theme and click Save
- Now anyone in the agency will have access to this new Map Theme
|
|
Set-up and Edit Data Filters
Another powerful data visualization tool built into GovClarity is the ability to quickly search data from any layer. The user has the ability to create custom data filters on any layer which can be easily toggled on and off within GovClarity. The data filter dynamically updates as the user navigates around the map providing real-time results based on exactly what the user is viewing.
|
Share Content
As mentioned in the Account Administration section, Admins can grant specific users or groups the ability to publish data to the Shared Folder. Sharing data is a great collaboration tool between users as it allows for sharing of Map Themes, data layers, layer styles, and results lists.
|
Related Information
|