|
GovClarity® Help > Documentation > Freehand Draw
|
|
GovClarity provides a variety of drawing tools to create custom maps and create your own spatial data. In addition to standard shapes, GovClarity offers a freehand drawing option that gives you the flexibility to draw any shape you need.
|
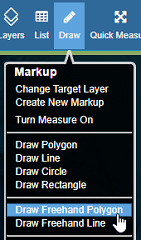
Drawing A Freehand Polygon
- Click the Drawing icon in the Main Toolbar. Confirm that the target layer selected at the top of the dropdown menu is the layer that you want your freehand drawing to appear on.
Note: for more information on Target Layers in the Drawing Tools section, see Related Documents below.
- Click Draw Freehand Polygon.
|
|
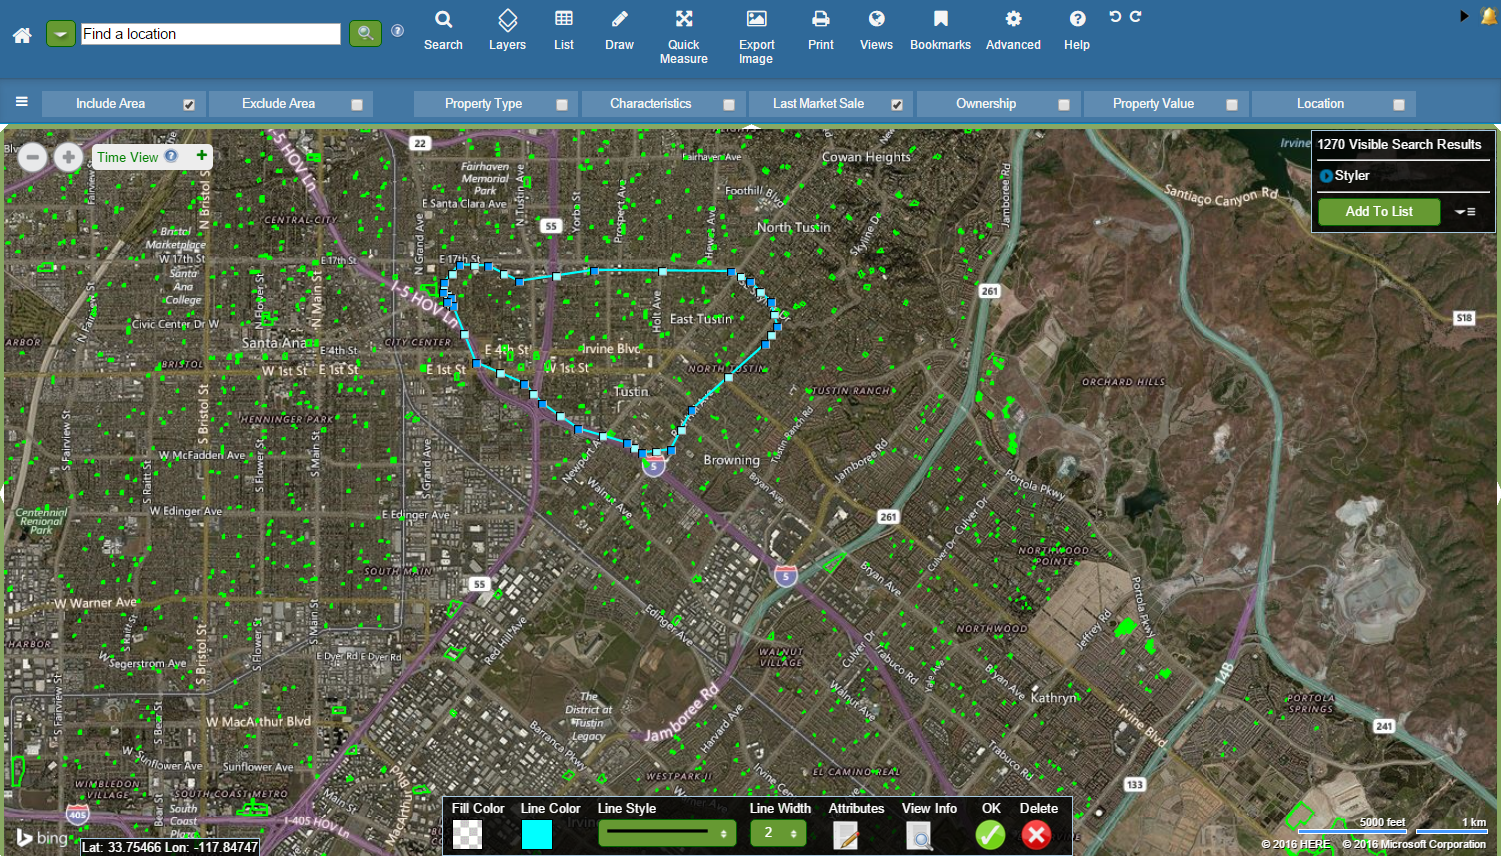
- Draw your area of interest:
- Click the cross-hairs on the map, and draw while holding down your mouse button.
- Release your mouse button to complete your drawing. GovClarity automatically closes the boundary line of your area of interest.
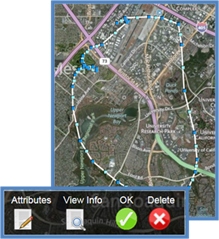
- A window appears and also a toolbar at the bottom of the map screen.
|
|
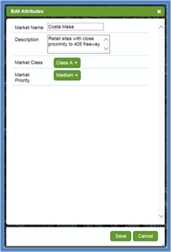
- Enter any pertinent information you want to save about your drawing in the Attributes Window.
- Click Save.
|
|
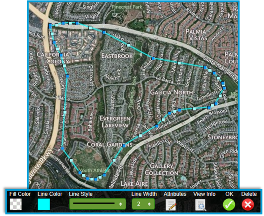
- Click the OK button
 on the toolbar. on the toolbar.
Tip: Style your freehand drawing by using the Drawing Toolbar. You can edit the fill color and/or line color, width, and style.
|
|
Modifying Your Freehand Polygon
To modify the shape of your Area of Interest:
- Click on the area of interest on the map to identify it. Its boundary line appears.
- Click on any square node of the boundary line, and drag it to your desired location.
To delete a Area of Interest:
- Click an Area of Interest on the map to identify it. Its boundary line appears, and also a toolbar at the bottom of the map screen.
- Click the Delete button
 in the toolbar at the bottom of the map screen. in the toolbar at the bottom of the map screen.
|
|
Related Information
|