|
GovClarity® Help > Documentation > Heatmaps
|
|
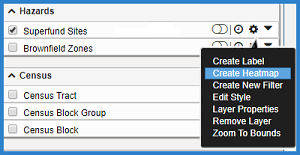
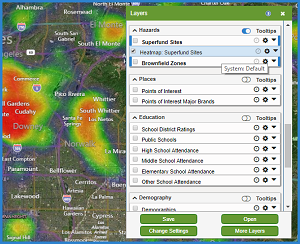
Get a better understanding of the density of data in your area with the Heatmap command. Generated from any layer, this command will create a second layer that allows for a quick assessment and quantification of information.
|
How to Create a Heatmap from a Layer
How to Display a Heatmap from a Results List
|
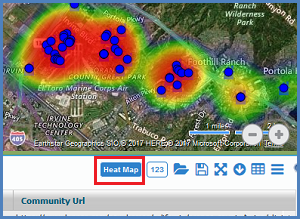
Heatmaps can also be displayed from a Results List by selecting the Create Heatmap button from the Results Lists. Read the full list of steps below.
- Add your search results to the Results List, or open a saved Results List.
- Click the Heatmap icon from the Results List icons.
- A new heatmap visual will display on the map. This can be toggled off by clicking the heatmap button a second time.
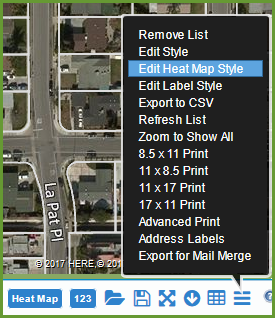
You can edit the style of the heatmap to change the intensity, and weight of each point. Use the Edit Heatmap Style option from the Results List Options to change the appearance. Read below to learn how to edit the style or appearance of the heatmap.
|
|
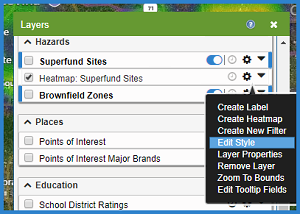
Editing the Style of your Heatmap Layer
Editing the Style of your Heatmap from the Results List
|
If you generated your heatmap from the results list, follow these steps to edit the style of your heatmap to change the appearance of it.
- Click on the Results List options icon and choose the Edit Heatmap Style option. The style editor window will open.
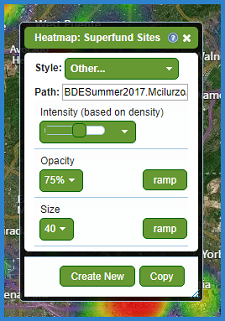
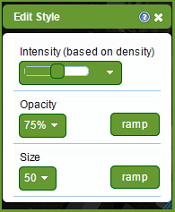
- With the style editor window open, you have the option to edit the Intensity, Opacity, and Size.
- Intensity: Changes the weight of each point.
- Opacity: Selects the translucence of the layer.
- Size: Affects the size of the heatmap around each feature on the map.
- When you're done editing the style. Close the window, and the style will save for you automatically.
|
|
Printing Your Heatmap
|
Printing Heatmaps is supported in the following browsers:
Chrome, Firefox, and Safari.
Export Image:
Not currently supported.
Note: You can use an external screen capture tool to take a snapshot of your map in GovClarity.
|
Related Documents
|