ZONING EDITOR
|
GovClarity® Help > Documentation > Zoning Editor
|
|
Zoning defines the types of developments, both residential and commercial, that are acceptable throughout a city. However, it is more than simply what is acceptable; it is about the quality of life that citizens enjoy in their city.
The challenge is keeping the published zoning data up-to-date to avoid dissemination of inaccurate information to constituents. Using GovClarity® and Zoning Editor you no longer have to rely on others to update zoning data; you have the ability to maintain it within the system to insure it is always up-to-date.
The workflow described below was designed around the necessary steps and process associated with updating a zone at the local government level.
|
Zoning Editor Overview
|
Zoning is one of the most important tools used by City staff and with GovClarity® and Zoning Editor you have the ability to edit and maintain the zoning data so that it is always up-to-date.
|
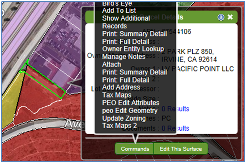
- Zoning Editor: Zoning updates begin with the parcel.
- Identify the parcel that is subject to the zoning update, click the Commands button and select Update Zoning.
|
|
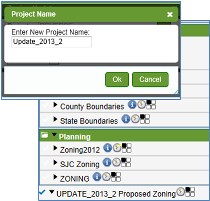
- If you are at the beginning of the update process you will create a Project.
- GovClarity® will create the Project folder and automatically place it in the legend.
Tip: Name your project using only alphanumeric characters and be sure not to include any spaces or special charater
|
|
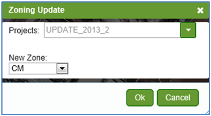
- The Zoning Update window showing the new project will display on the map.
- Select the appropriate project, if you have more than one active project click the drop down arrow to view your project list.
- With the project selected click the New Zone drop down menu and
- Select the correct new zone type and click the ok button.
|
|
- Tip: Activate the project in your legend, and deactivate the original zoning layer, to visually display the updated zoning on the selected parcel.
- Tip: If you have multiple parcels to be included in the same project, identify each parcel individually, select Update Zoning, select the appropriate project, select the correct new zone type and click the ok button. You may repeat these steps as required to add all the impacted parcels to your Zoning Update project.
|
Zoning Editor Notifications
We understand that for some zoning updates there may be an extended period of time before final City Council approval. We created a notification system to keep you advised when you have a pending project.
|
|
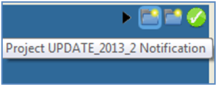
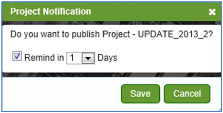
- When you click OK on the Zoning Update dialog box, GovClarity® creates the project notification.
- To establish a reminder for the project, check the Remind in box and select the desired number of days for your reminder.
|
|
|
Tip: Be sure to check the Remind in box when you set the reminder! This will change the button from Publish to Save. Each time you login to GovClarity® you will see a reminder that you have an open, active project.
|
- If you do not wish to set a reminder and are not to ready to publish the zoning update click the "x" to close the Project Notification window.
- Click the Advanced Menu on the toolbar, select Check-in Changes. The project will update with your changes; however, it will not publish the project.
|
|
Publishing Your Project
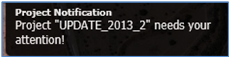
When you are ready to publish your project you will access it through the notification that displays at login.
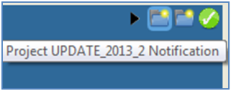
- Click the notification icon to launch the Project Notification window and click the Publish button.
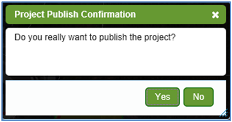
- A confirmation message will display to confirm that you wish to publish the project.
- Once you publish the project your zoning layer will automatically update and the "update zoning project" is retired from the legend.
Tip: You can use the View In Time feature to set your map view to a time prior to the publishing of zoning updates. This feature does not reverse your publication of zoning updates.
|
|
Update Parcels with Multi-Zoning
While you are still working within your Zoning Project, you can update parcels with multi-zoning. The process to update zoning in this manner is slightly different.
Tip: You can only add polygons to the zoning layer when you are working in a zoning project and it is unpublished.
- First activate the zoning layer to display the current zoning.
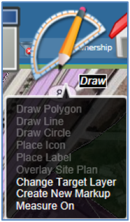
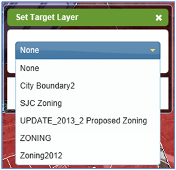
- Select the Draw Tools and select Change Target Layer which opens the Set Target Layer window.
- Select the project to which you want to add this parcel and click the OK button.
- When you select the draw tools you will have the ability to select a specific draw tool.
- Use the draw tool to outline the portion of the parcel selected for the zoning update.
|
|
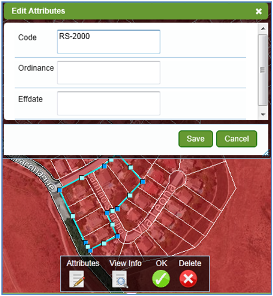
- When the drawing is complete the Edit Attributes window opens.
- Input the new zoning code and click the Save button.
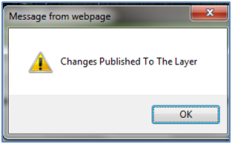
- To Publish your changes, click on the Advanced icon and choose Check In Changes. The changes are now published to the zoning layer.
|
|
Related Information
|
|