Getting to Know the Product Interface
|
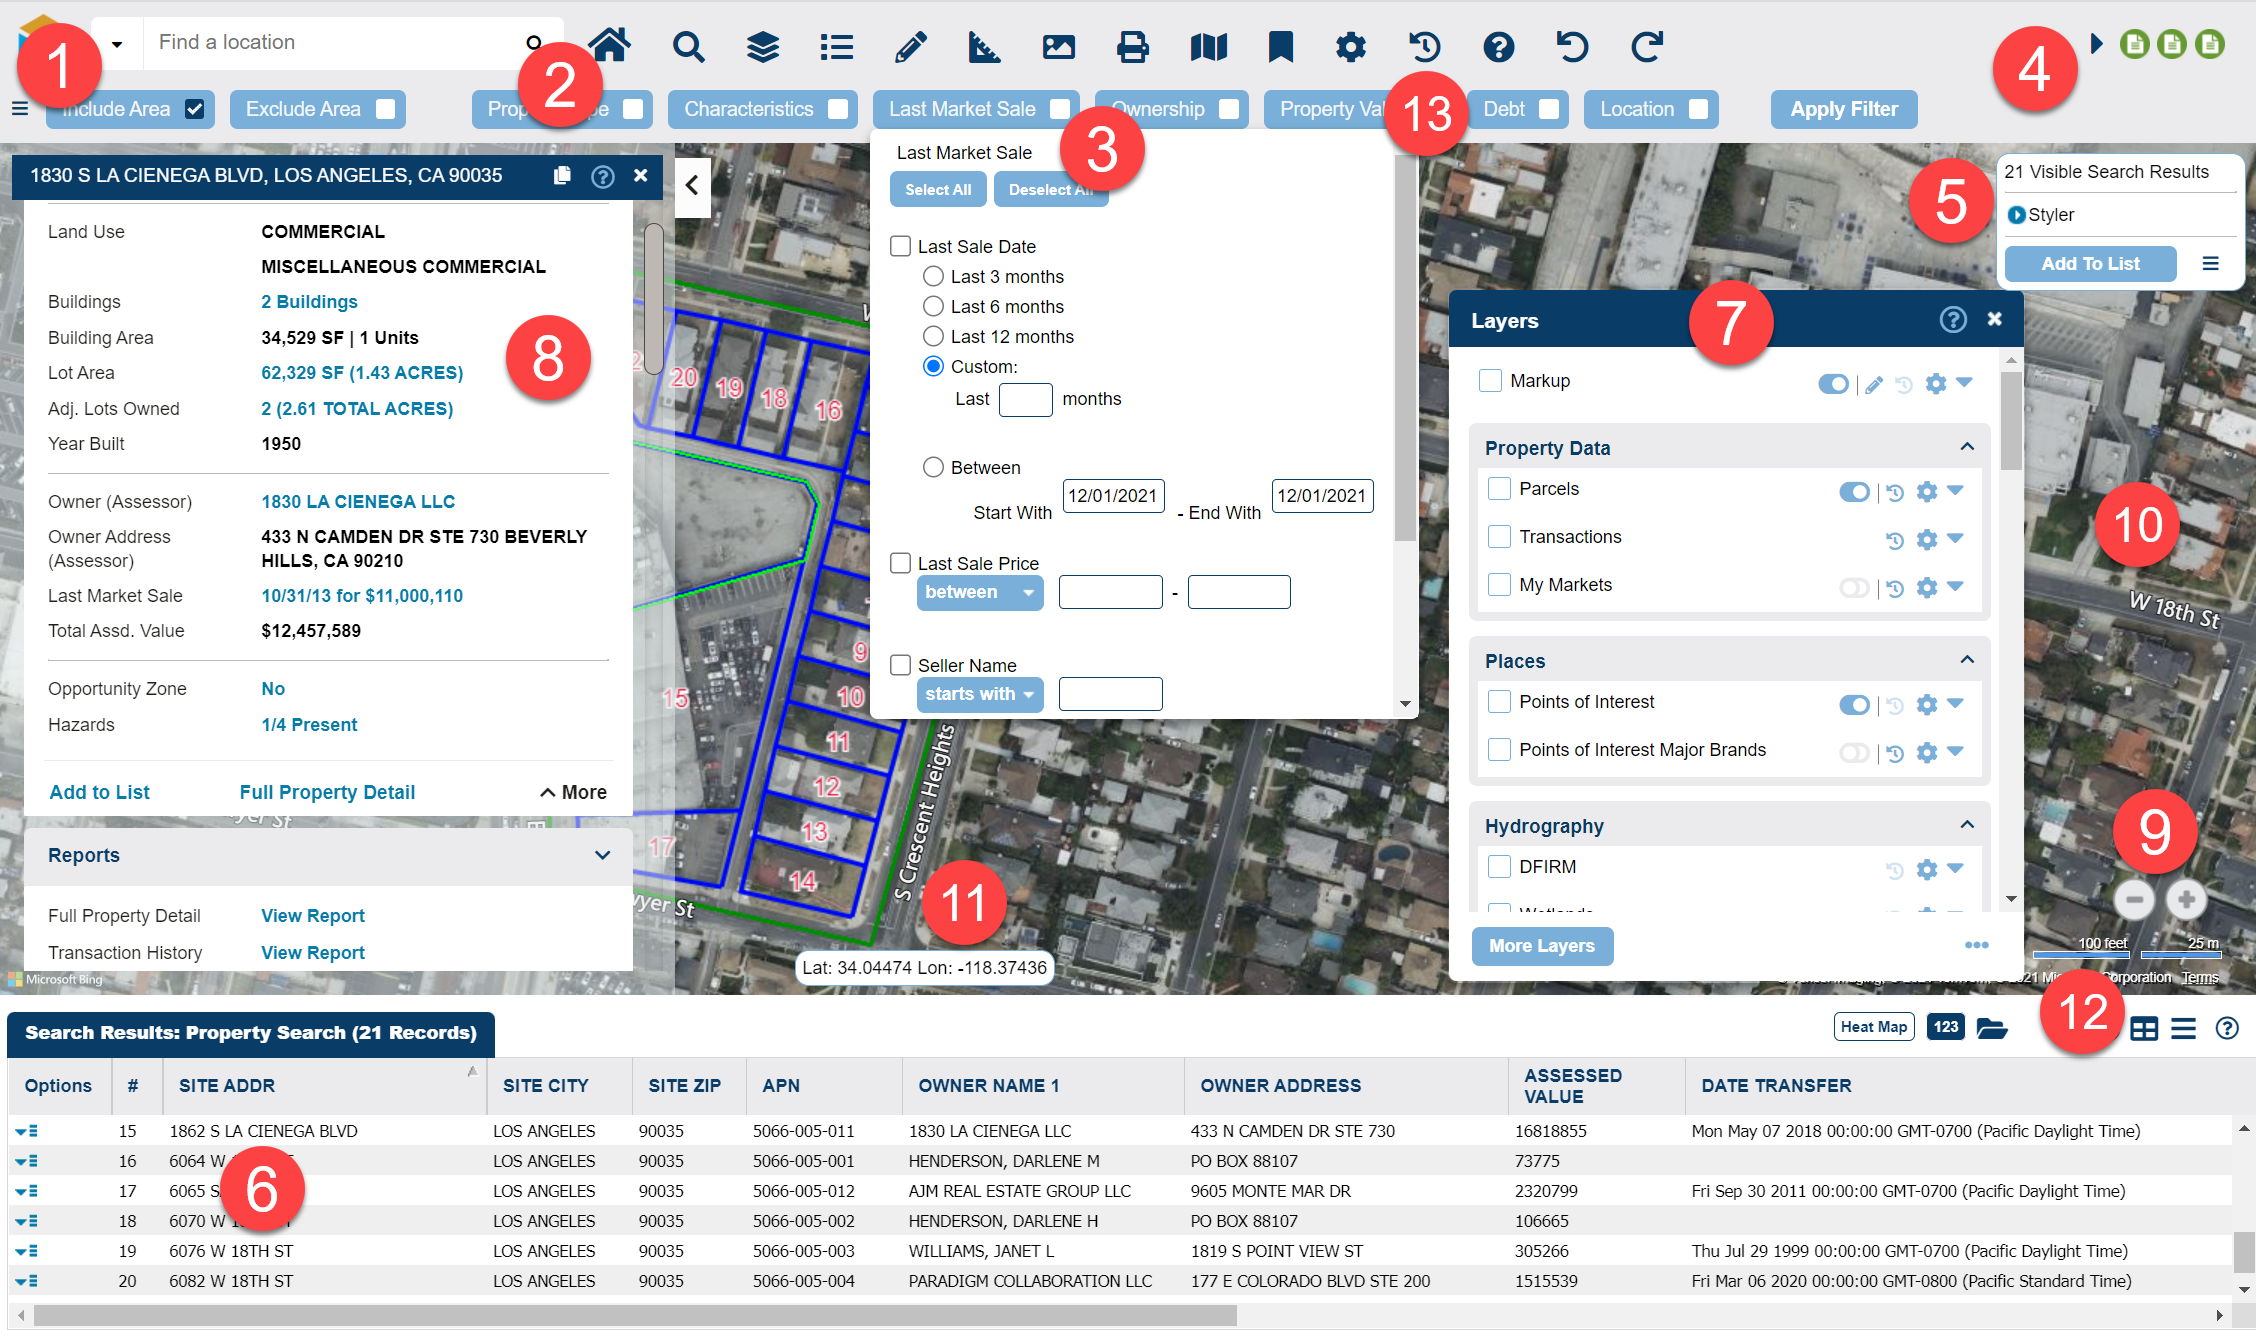
- Locate - Need to find a particular property, place, or thing? Search by addresses, owners, APNs (Assessor's Parcel Numbers), street intersections, neighborhoods, communities, Points of Interest, and more.
- Main Toolbar - Access our essential search, data, presentation, and analysis tools, including a robust selection of Search Filters, Layers, the Search Results list, extensive drawing tools, and more.
- Filter Bar - Fine tune your Search Filter criteria with this quick edit bar. Click the Apply Filter button for your updates to take effect.
- Notification Icons - Icons appear here to confirm the success or completion of a task, such as your data load, or that a Map Report is ready to print. Click the notification icon to download reports, or find out more info.
- Search Results Box - View a count of your search results on the map screen. Click the Add to List button to further your analysis by creating a tabular listing of your search results in the Search Results List.
- Search Results List - From this tabular listing, view the attributes of the properties that match your search criteria, and export your Results List to a spreadsheet program, such as Microsoft Excel®, or to your contact management system.
- Layers - This feature provides the intersection of data, location, and visual analysis. View all your active layers, and access the tools to load and visually distinguish the important attributes of your data.
- Location Panel - Save time in your research. Click on a parcel, or search an address, and the Location Panel appears with details such as APN, Assessed Value, Last Sale Price, etc., and a variety of one-click commands to access tax maps, transaction history, enhanced property detail, and much more.
- Zoom Icons - Zoom in or zoom out to change the map view.
- Map Screen - The map screen is the core component that displays search results, layers, and map tools.
- Latitude & Longitude - Displays your specific map screen location, which dynamically updates as you navigate and move your cursor.
- Scale Bar - Provides a map scale, that updates as you zoom in or out.
- TimeView - This feature allows you to view current satellite imagery as well as access a database of historical satellite imagery that appears right on your map with the click of a mouse. TimeView is available as an add-on. For pricing and more information visit our Request Timeview Information page or contact your account manager.
|
Navigating the Map Screen
Zooming, Panning, Identifying and Nudging
- Zoom Buttons:
- To zoom in, click on the plus.
- To zoom out, click on the minus.
- Mouse Wheel:
- Move your cursor over a location.
- To zoom in, roll the mouse wheel forward.
- To zoom out, roll the mouse wheel backward.
- Mouse Double-Click:
- Double-click the map to zoom in and center the map at the location of your double-click.
- Each double-click zooms in one zoom level.
Zoom to a Rectangle:
- While holding down the SHIFT key on your keyboard, click the map screen and drag your mouse to draw a rectangle (visible onscreen).
- Letup on the mouse button. The map screen zooms to the rectangle.
Panning:
- Click the map screen and drag your mouse to your desired location.
Identifying Map Information:
- The Map in LandVision has a wealth of information available for you to explore. To identify shapes and markers on the map, simply click on them with your mouse. If additional information is available, an information balloon will appear.
Note: to identify a layer, it must be marked as identifiable in the Legend ("i" icon is red). To turn on "identify" for a layer, click the "i" icon so the "i" turns red.
Nudging:
- Click the nudge bars on the perimeter of the map screen to incrementally move the map left, right, up, or down.
- When you hover your cursor over a nudge bar, it becomes yellow.
Undo/Redo:
- To undo your last zoom, pan, or nudge, click the Undo icon
 on the Main toolbar. on the Main toolbar.
- To redo your last zoom, pan, or nudge, click the Redo icon
 on the Main toolbar. on the Main toolbar.
Note: See the section above, Getting to Know the Product Interface, for the location of the Main toolbar.
|

|
Related Information
|