|
LandVision™ Help > Documentation > Create a Map Exhibit
|
|
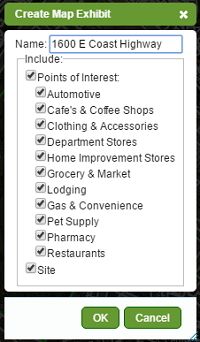
The LandVision™ Commercial and Builder Editions enable you to create a polished and custom map exhibit for presentation purposes. In just a few clicks, you can present your subject site with information about the surrounding market to highlight desirable amenities such as nearby restaurants, shopping centers, access to major transportation and more.
|
Creating a Map Exhibit
Modifying a Map Exhibit
- To modify the icons on your Map Exhibit, click on any icon in your map view.
- The Drawing Toolbar appears at the bottom of the map screen once the icon is active.
Note: You can rotate a selected icon by clicking on the green point at the end of the dashed line, and while holding the mouse down turning it to your desired location.
|
|
- Click OK in the Drawing Toolbar to accept your selections. The Drawing Toolbar closes and the icon is de-selected.
Tip: There are many options to customize your map exhibit. Your map exhibit is created as the target layer. The target layer is the active layer that drawings are added to. You can draw shapes and lines, and place icons, labels, and overlays on your map exhibit using the Drawing Tools in LandVision™ (See Related Documents for more information).
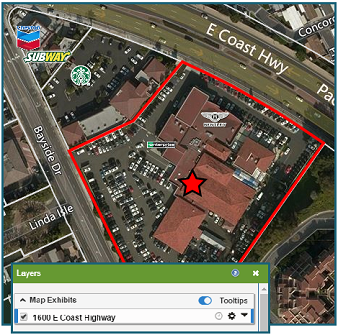
You can even change the default site icon, the red star, to a different icon or image.
|

|
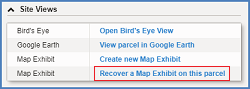
Opening a Map Exhibit
|
If you want to open a previously created map exhibit, you can follow the steps below.
- To open a map exhibit, select any parcel on the map.
- Next, scroll down to the Site Views card, and select the Recover a Map Exhibit on this parcel command.
|
|
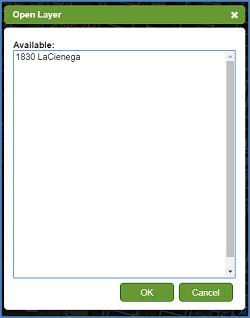
- A list will display every Map Exhibit you have ever created.
- Click on the Map Exhibit you would like to open, then select OK.
- The map exhibit will be added to your Layers, and the map will zoom to the full extent of the exhibit.
|
|
Related Information
|