Preparing the Shapefile
|
Preparing Your Shapefile for Importing
Requirements:
- Required Upload Format: Shapefiles must be contained in a zip folder, and there should be no nested folders within the zipped folder.
- Required File Types: The zip folder must contain the following file types:
- Upload File Size Limit: 30MB
Note: If needed, the following free applications enable you to modify your Shapefiles before loading them into LandVision™:
|
Uploading the Shapefile
Note: If you need to apend/update a shapefile, follow the same steps below and when naming the shapefile, apply the same name as the exisiting shapefile to be updated to overwrite it.
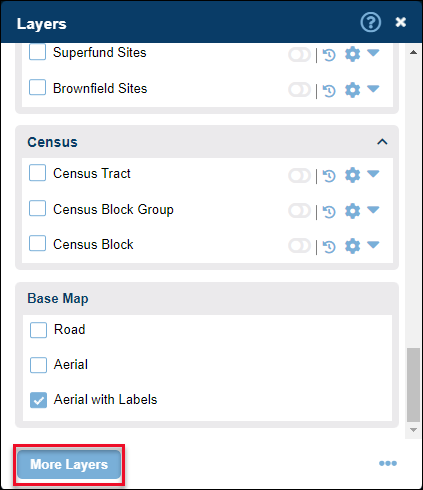
- Click the Layers icon
 on the Tool Bar. on the Tool Bar.
- Click the More Layers button at the bottom of the Layers panel.
- Select a folder from the Folder drop-down list in which to save your data set.
Note: Most commonly used folders:
- USER - Only you can view layer.
- SHARE - Allow others on your LandVision account to access this layer
Note: To create a new folder for your data set, select New. The Create Folder window appears. Enter the name of your new folder and click OK. Your new folder appears in the Folder drop-down list.
- Click the Load Data drop down menu, then select Shapefile.
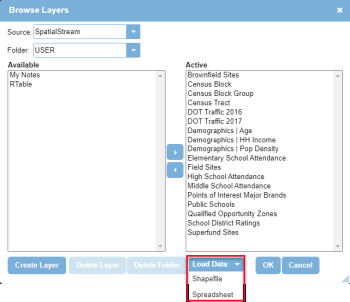
Note: If you don't have permission to use your selected folder, the options in the Load Data drop down menue are grayed out. Select another folder to save your data set.
- In the Shape Loader window, assign a Layer Name.
- Click Choose File and find the .zip file you want to upload. Then click Upload.
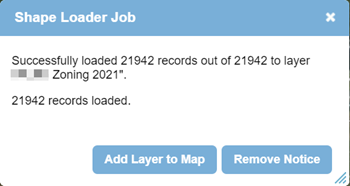
- In the status area in the upper right corner of LandVision™, click the Layer Icon
 once the upload is finished. once the upload is finished.
- In the Shape Loader Job window, click Add Layer to Map to place it in your Layers panel and place the data on the map.
|
Related Information
|
