TOOLTIPS


LandVision™ Help > Documentation > Tooltips

Tooltips enable key information to be quickly viewed at a glance by hovering over a parcel or other currently active feature. If multiple data layers are active, clicking the parcel or feature on the map will open another tooltip with all the available layers to choose from. The tooltips can be configured to show the data most relevant or helpful for you. Learn more below.

Tooltips


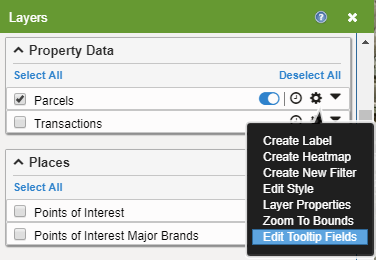
Layer tooltips can be activated by clicking the Tooltip toggle Tooltips and layers on the layer in the layers panel.

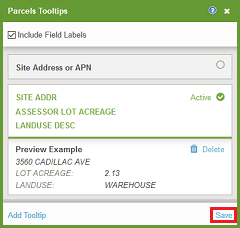
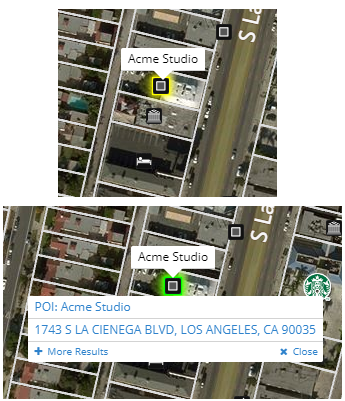
By default, on a parcel, the property address displays. If property address does not exist, then the APN will display instead. If the parcel is a multi-unit property, the tooltip will read "Multi-Unit"

If multiple data layers are turned on, clicking on the property or feature will open a list of features that currently have tooltips active, which will allow you to select which data layer you want to open the Information Panel for.

Clicking on More Results will open the Location Information panel and display all available layers at that location at the bottom of the panel.

Tip: The Tooltip must be toggled on (blue), and the layer must be toggled on (visible), for the Tooltips to appear.

Note: Some layers do not have Tooltips such as the Hydrography and Base Map groups.
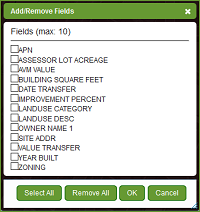
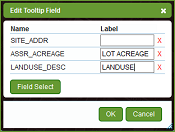
Tooltips and layers

Editing Tooltips


The fields that appear on the Tooltips can be edited to display the information that is relevant to you. Follow the steps below to add or remove fields from the Tooltips.


  1. Click the options icon on the layer for the Tooltip that you would like to edit. The Tooltip Editor will open.

  2. Note: You can set up multiple Tooltip presets, and save them for later.


  3. With the Tooltip Editor open, click Add Tooltip in the bottom left hand corner. This will allow you to create a new Tooltip preset.


  4. From the Add/Remove Fields window you can check or uncheck the fields you would like to display (or hide) in the Tooltips. You can choose up to 10 fields to display in a single Tooltip preset. When you are finished selecting fields, click OK.


  5. To modify the label for the Tooltips, you can do so by editing the label field. Sorting the Tooltips can be accomplished by dragging and dropping them to the desired location.


  6. When you have finished editing your Tooltips, click OK and your new Tooltip preset will be created.


  7. The new Tooltip preset will automatically be selected as indicated by the active designation.


  8. Note: You can switch between the Tooltip presets by clicking on them. Deleting a preset can be accomplished by selecting it and then clicking on the Delete option.

    Tip: If you want the Tooltip Field Labels to display, make sure the Include Field Labels box is selected in the top left corner.


  9. Click the Save button at the bottom right hand corner to complete the process of adding, editing, or removing your Tooltip presets.


Edit Tooltip Fields

Edit Tooltip Fields

Edit tooltip Fields Panel

Edit tooltip Fields Panel

Save tooltip Fields

Return to Top

Related Documents


© Copyright 2017 Digital Map Products About DMP | Contact Us