|
LandVision™ Help > Documentation > Builder Target Sites
|
|
Once you've found and evaluated your Candidate Sites in a Submarket (see Related Documents), LandVision™ Builder enables you to define the most promising Candidate Sites as Target Sites to which you can add your personal insights and research data.
|
Defining Target Sites Overview
This section describes the workflow to define Target Sites in a Submarket. It is a continuation of the workflow to find and evaluate Candidate Sites (see Related Documents).
- Identify a Candidate Site as a Target Site
- Define the Target Site by adding your:
- Insights and Site Data
- Site Builder and Developer Contacts
- Site Images, such as photographs, plans, and other site related images
- Continue to define the Target Site as you develop your research and assessments
- Define multiple Target Sites in the Submarket
|
Defining Target Sites and Adding Site Data
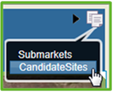
- Click your desired Candidate Site on the map to identify it. The Candidate Sites window appears.
Note: If the Candidate Sites window does not appear, a Notification icon  may display at the top right corner of the map screen. Click the Notification icon. A menu opens that lists two or more layers. Click Candidate Sites on the menu. Then click your desired Candidate Site on the map to open the Candidate Sites window. may display at the top right corner of the map screen. Click the Notification icon. A menu opens that lists two or more layers. Click Candidate Sites on the menu. Then click your desired Candidate Site on the map to open the Candidate Sites window.
- Click Modify at the bottom of the Candidate Sites window to define a Target Site.
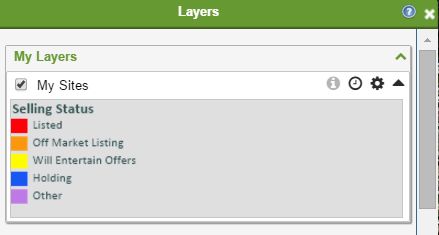
- The Target Sites layer is listed in the Legend in your Acquisition Project group.
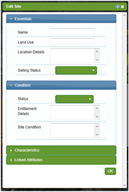
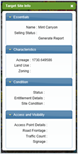
- The Edit Site window appears.
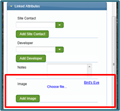
- Fill in your desired fields in the Edit Site window to record personal insights and your research data about the Candidate Site.
In the Linked Attributes section:
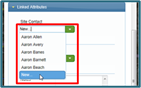
- Here's how to add contacts:
- Click the Site Contact or the Developer drop-down list.
- Click New… at the bottom of the list. The Edit Attributes window appears.
- Enter data about your contact in the window.
- Click the Save button.
Tip: To add more than one Site Contact, click the Add Site Contact button. To add more than one Developer contact, click the Add Developer button.
- Here's how to select contacts:
- Begin typing in the Site Contact field or the Developer field. Matching contacts auto populate in the field.
- Here's how to add images:
- Click the Choose file link. The Attach a file window appears.
- Click the Browse button in the window, and select your desired file. The Name and Description fields are optional.
- Click OK. The image file name is added to the window.
Tip: To add more than one image, click the Add Image button. The Choose file link appears. Repeat the steps above.
- Here's an easy way to create an image file of your Target Site:
- Click Bird's Eye. A window appears with a Bing® Bird's Eye image of your Target Site.
- Right click on the image to save it. You can then upload it into the Edit Site window.
- When you've completed filling in the form, click OK at the bottom of the Edit Site window. Your Target Site is created.
Here's how to view your Target Site information:
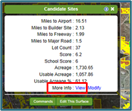
- Click on your desired Site on the map to identify it. The Candidate Sites window appears.
- Click the View link next to More info. The Target Site Info window appears.
Here's how to edit your Target Site information:
- Click on your desired Site on the map to identify it. The Candidate Sites window appears.
- Click the Modify link for More info. The Edit Site window appears.
- Edit your desired fields in the window.
- Click the Save button when you've completed your editing.
|
.png)
|
Managing Target Sites
Once you've created many target sites in a Submarket, it is best practice to simplify the map view.
Keep your Target Sites layer turned on in the Legend, and toggle off the Candidate Sites layer. Your Submarket then displays only your Target Sites on the map for ease of viewing. You can toggle your Candidate Sites layer back on at any time.
- Click a layer in the Legend to toggle it on or off. The Blue Check
 on a layer means the layer is turned on. on a layer means the layer is turned on.
|
|
Related Information
|