|
GovClarity® Help > Documentation > Property Setback Tool
|
|
Use the Property Setback tool to display a Setback on the map with a few easy steps.
Tip: To create a Map Report or print the map displaying your Setback, click the Print icon on the Main toolbar. (See Print in Related Documents for more information.)
|
Creating a Property Setback
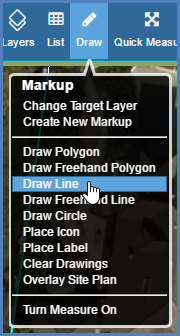
- Click the Drawing icon on the Main Toolbar. The Drawing Tools menu appears.
- Click Draw Line on the menu.
- Draw your line:
- Click on the map to begin your line.
- Let up on the mouse button, and move your mouse over the map to extend the line.
- Double-click to end the line.
Tip: To change the line color, style, or width, use the Drawing toolbar at the bottom of the map screen. To shorten or lengthen the line, click on the node at either end of the line. While holding down the mouse button, modify the line by moving your mouse.
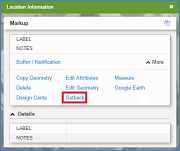
- Click the View Info icon
 from the Drawing toolbar. The location panel appears. from the Drawing toolbar. The location panel appears.
- Click More to display all the commands
- Click the Setback command. This message appears: "Please Choose the Direction of Setback by Clicking on the Map."
- Click on the map above or below your line to set the direction of the Setback. The Setback box appears.
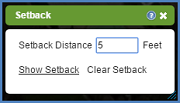
- Perform the following in the Setback box:
- Enter your desired Setback Distance in feet.
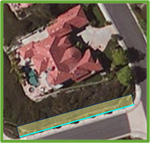
- Click the Show Setback link. The Setback appears on the map. (To remove the Setback from the map, click the Clear Setback link.)
|
|
Related Information
|