Broker Data
Broker Data Overview
|
LandVision™ Commercial enables brokers to store, connect and organize information related to properties. By combining the following assets in a centralized database, brokers can spend less time organizing information and more time revealing opportunities and tracking their market. The Broker Data components consist of:
- Site Details - Information about a real estate site, such as a piece of land or a parcel containing a building, such as an office complex. This layer is represented as polygons on the map and will be known as the 'My Sites' layer in your legend.
- Buildings - Found under Site Details, this is information about a building, such as an office or industrial building located on a parcel. This layer is represented as points on the map and will be known as the 'My Buildings' layer in your legend.
- Contacts - Contacts can be entered and managed two ways: 1) Contacts can be imported via your Microsoft® Outlook contacts; 2) Contacts can be entered in and linked to a Property at the time of creation. Refer to the Contact Management section to learn more about these two methods. This layer is not represented on the map, but rather is linked to Site Details.
- Notes - Notes can be entered and managed two ways: 1) Notes can be entered in and linked to a Property at the time of creation. 2) Notes captured by LandVision™ Connect (mobile app) are auto-synchronized and therefore are instantly viewable in LandVision™ Commercial. Notes can consist of voice memos, photos or text notes. This layer is not represented on the map, but rather is linked to Site Details.
|
Creating a Property on a Site
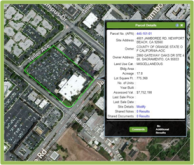
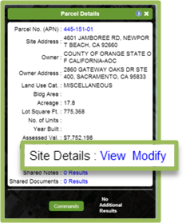
- Identify the parcel you'd like to create a property for by clicking on a parcel.
|
|
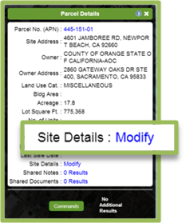
- From the Parcel Details window, locate Site Details. Click Modify to enter in the following details:
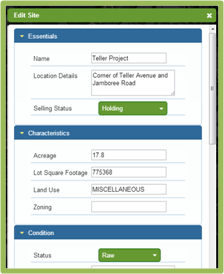
- Essentials: Name of site, location details and selling status.
- Characteristics: Acreage, lot square feet, land use and zoning.
- Condition: Status, entitlement details and site condition.
- Visibility: Road frontage and traffic count.
- Additional Info: Insert any related website by their URL.
- My Contacts: Insert any related contacts to this property here. To learn more about linking contacts to a property, refer to the Contact Management section.
- My Notes: Insert any related notes to this property here. To learn more about capturing notes with the mobile app, refer to the LandVision™ Connect section.
Note: My Notes located under Site Details are only viewable by the account user. Shared Notes and Shared Documents located under Parcel Details are public and therefore viewable by all account users in the organization.
|
- Click OK to save your information.
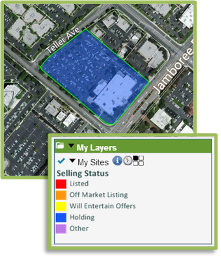
- Once your information is saved, the site's style will display the color of the selling status in the legend that was indicated by the user under the Essentials section.
|
|
|
|
|
|
|
|
Adding a Building to a Site
- Once a property has been created on a site, a building can be added to a property. To add a building, click on a parcel with an associated site.
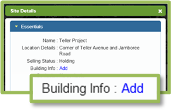
- Locate Site Details. Select View.
|
|
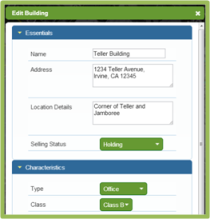
- Locate the Building Info. in the Essentials section of the Site Details window. Click Add to enter in the following details:
- Essentials: Name of building, address, location details and selling status.
- Characteristics: Building type, class, building area, rentable building area, number of stories and number of units.
- Condition: Status, entitlement details and site condition.
- Visibility: Road frontage and traffic count.
- Parking and Amenities: Parking conditions and miscellaneous amenities.
- Additional Info: Insert any related websites by their URL.
|
- Click OK to save your information.
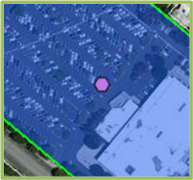
- Once your information is saved, the site's style will display a point on the parcel and a new layer named My Buildings will display in the legend. To edit this point, choose Edit Style from the Options menu in the My Buildings layer in the legend.
|
|
|
|
Viewing and Accessing Broker Data
- Identify the subject property that intersects with an associated site.
Tip: Sites wil be indicated as a styled parcel on the map.
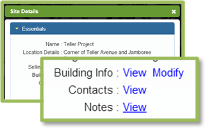
- Locate the Site Details field from the Parcel Details window. Choose from the following options to display the following:
- Select View from the Site Details field to display detailed information regarding the property.
- From the Site Details window, select View from the Building Info field to display detailed information regarding the building.
- From the Site Details window, select View from the Contacts field to display any contacts linked to the property.
- From the Site Details window, select View from the Notes field to display any notes linked to the property.
|
|
Related Information
|
| |