|
GovClarity® Help > Documentation > Results List
|
|
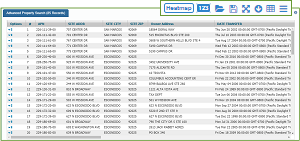
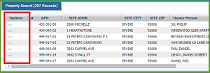
The Results List is a tabular listing of your search results that display on the map. It has many uses. In GovClarity®, your Results List provides you with a convenient way to view the attributes of the properties, or other layer features like manholes, that match your search criteria. You can export your Results List to a spreadsheet program, such as Microsoft Excel®, create address labels, or export for a Mail Merge as well.
|
Using the Results List
Here's how to use the Results List:
- Zooming to a Specific Search Result: The number of each record in the # column matches a numbered feature on the map. Click on a record, the map zooms to that numbered feature if it isn't in map-view, and the Location Informationpanel displays for that record.
Note: In the Results List, records that you hover over are highlighted in yellow. After you click on a record, it is highlighted in blue.
- Sorting the Results List: Click on a column heading to sort the Results List on the lowest or highest numerical or alphabetical value in that column. The numbered search results on the map will update to reflect your new sort method.
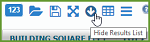
- Full Screen Results List: Click the Full Screen icon on the right of the Results List header for full screen viewing of the list.
- Minimizing or Displaying the Results List: There are two ways to toggle the list open and closed:
- Click the Results List icon on the Main Toolbar.
- Click Hide Results List icon on the right of the Results List header.
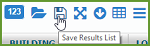
- Saving Your Results List: You can save your results lists for future reference. See Save And Open Results List in Related Documents for instructions.
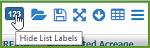
- Hide List Labels/Numbers: Click this icon to toggle the results list numbers ON or OFF on the map.
- Heatmap: Choose this option to display a Heatmap for your results list records. Learn more.
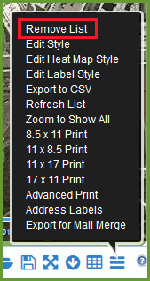
- Removing Your Results List: Click the Options icon on the right of the Results List header, and select Remove List from the menu. If you have not saved your results list, you will not be able to retrieve it.
|
|
Results List Options
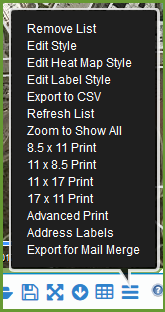
You can apply a variety of options to the Results List. Click the Options icon on the right of the Results List header to open the Results List Options menu.
Edit Style: See Styling Your Map for instructions.
Export: There are two options to export your search results list as a csv file. A csv (comma-separated values) file can be opened in spreadsheet programs, such as Microsoft Excel®.
- Export for Mail Merge enables you to use your search results in a program with a mail merge feature, such as Microsoft Word® and includes related condo properties. (See Export for Mail Merge for instructions.)
- Export to CSV is a direct export of the items in the results list and includes only parent condo properties.
Zoom to Show All: GovClarity® zooms to display all search results on the map.
Print: Select the print size for the map and the search results in tabular form. For more print features, select Advanced Print.
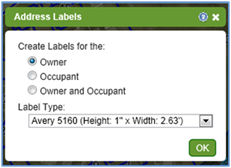
Address Labels: Export your search results as address labels. The wizard will ask if you want to export owner, occupant, or both addresses. You will be able to select the label size that fits your label paper.
|
|
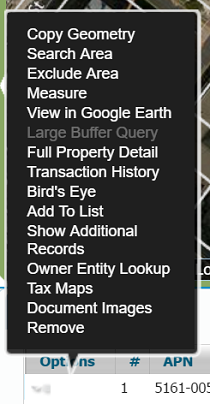
Record Options
You can apply a variety of options to each record in the Results List. The Options column is the first column in the Results List. Click the Options field of your desired record to open the Record Options menu.
Copy Geometry: Copies the selected record's geometry to another layer.
Search Area/Exclude Area: Allows you to restrict your search to the record/feature.
Measure: Measures the feature or property.
View in Google Earth: Downloads a KML file that can be used to view the feature in Google Earth.
Buffer / Notification: Create a buffer around a property or feature to find all properties within the specified buffer around.
Transaction History: Displays a printable report of the transaction history.
Bird's Eye: Opens a bird's eye view of the selected record in a separate window.
List Units: Opens a new results list which displays additional records/units associated with the selected property.
Full Property Detail: Displays a printable report of the full property details.
Owner Lookup: Selecting this option takes you to the website: www.CorporationWiki.com which provides Owner information from the Secretary of State.
Add Single Address: Adds a single address as a point to the Custom Addresses layer.
Add Repeating Addresses: Adds multiple repeating addresses as points to the Custom Addresses layer.
Add Address Group: Adds a specified range of addresses as points to the Custom Addresses layer.
Edit Attributes: Edit the values of the selected feature.
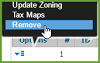
Update Zoning: Change the designated zoning for the feature.
Tax Maps: Downloads a copy of the Tax Map of the property from the Assessor's Map.
|
|
Remove/Refresh: To remove a record from the Results List:
- Click the Options field for the record you'd like to remove.
- Select Remove from the Record Options menu. The record is grayed out.
- Select Refresh List from the Results List Options menu. To open the menu, click the Options icon on the right of the Results List header.
Note: Once you select Refresh List, the selected record is removed. Before you refresh the list, you can restore the grayed-out record. Open the Record Options menu and click on Restore.
|

|
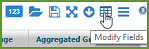
Modifying the Fields of Your Results List
Here's how to modify the fields of Your Results List:
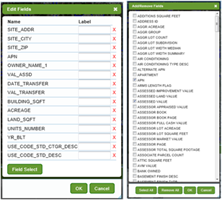
- Click the Modify Fields icon on the right of the Results List header. The Edit Fields window opens.
- In the Edit Fields window, you can:
- Edit Field Names: If the meaning of a column heading in the Results List is not easy to understand, enter a replacement field name in the Label field.
- Move Position of Field: Drag and drop any field to another location in the list. This re-orders the columns in the Results List.
- Remove Field: Click the Red x to remove a field from the Results List.
Tip: If you remove a field by mistake, use the Add/Remove Fields window to add the field to the Results List.
- Click the Field Select button at the bottom of the window to add or remove fields in the Results List. The Add/Remove Fields window opens.
- In the Add/Remove Fields window, you can add or remove individual fields by clicking a check box. Or, you can select or remove all fields by clicking the buttons at the bottom of the window.
- Click OK in the Add/Remove Fields window to accept your selections. The Edit Fields window displays.
- Click OK. All your modifications appear in the Results List.
|
|
Related Information
|