POINTS OF INTEREST DATA
|
LandVision™ Help > Documentation > Points of Interest Data
|
LandVision™ provides you with Points of Interest (POI) data* to easily display on the map for research and presentation purposes. In a just a few clicks, you can discover and further analyze your subject site based on its surrounding POIs. LandVision™ offers three ways to seach for POI data:
- Points of Interest Search: Search for major brands, retailers, restaurants, hotels, gas stations, and more. These points are represented by brand logos placed automatically for you on the map.
- Points of Interest Layer: Turning on the POI layer displays specific points of interest on the map and can range from businesses, restaurants, big box stores, retailers, parks, attractions and more. These points are represented by a POI icon
 , or by the retailers logo. , or by the retailers logo.
- POI Major Brands Layer: The Points of Interest Major Brands layer displays retailer logos from over 1,600 companies on the map, providing a clean view of the tenant data.
Note: POI data comes standard in the Commercial Real Estate and Builder Developer Editions of LandVision. The data can be added to Enterprise accounts as a paid add-on. Contact your account manager to learn more.
|
Using the Points of Interest Search Filter
|
|
- Click on the Search icon
 from the Main Toolbar. The Search Filter window appears. from the Main Toolbar. The Search Filter window appears.
- Select Points of Interest Search from the Search drop down menu.
- Select your desired search filter criteria with the following search filter options:
- Major Brands POIs can be searched from a list of major brand names.
- Official Name/Brand Name:
Official Names or Brand Names can be specifically searched for.
- Business Information:
Search by the business location attributes.
Note: Credit Rating Code is not a credit FICO score. It is a measurement provided by InfoGroup based on the longevity and revenue of the business.
- Industry: Search by Standard Industrial Classification (SIC) and North American Industry Classification System (NAICS) titles as well as primary and secondary codes.
Note: When using the Secondary SIC Codes the Contains function should be used as there could be multiple codes for each property.
- Service Group:
POIs can be searched for by their classified Service Group. Filter by one or more service groups by selecting the respective radio button.
- Service Category/Service Subcategory:
POIs can be searched for by their service or subservice categories (e.g. Dentist) using the following conditions: starts with, is, is not, ends with, contains, is empty and is null.
- Location:
The POI can be constrained to a specific City, Zip or Street Name.
- Click OK to run your POI search. Your search results appear as POI icons , or retailer logos on the map screen and are counted in the Search Results box.
Tip: Use the Search Filter Bar to quickly adjust your search filter criteria. It is below the Main Toolbar. Hover over a tab, such as Brand Name, to open a drop-down list with search filter criteria. After changing criteria, click the apply filter button to put the changes into effect.
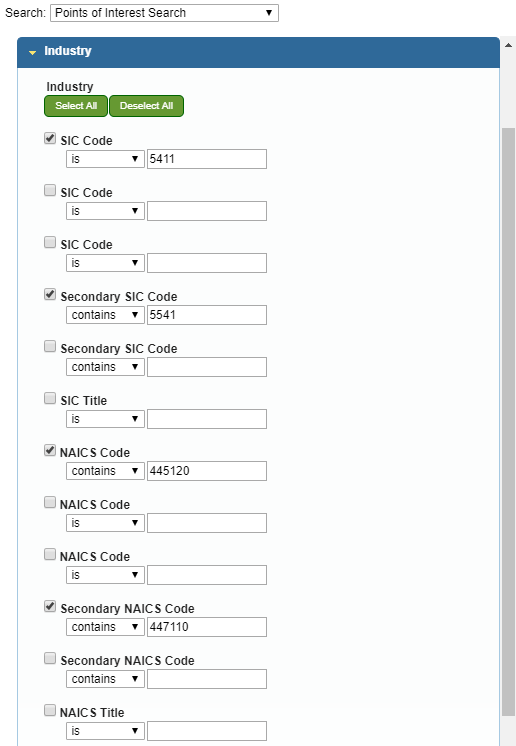 Example Image: SIC/NAICS Titles and Codes
| |
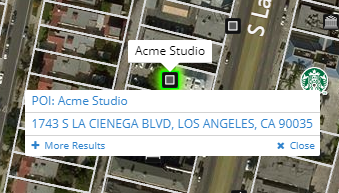
- Hover over any POI icon on the map screen. Click the icon to bring up the available tooltips at that location. Select the POI from the tooltip.
Alternatively, if tooltips are turned off, select More Results. In the Location Information Panel, click Results at this Location and then Show More Results. Then select the POI from the list. |
|
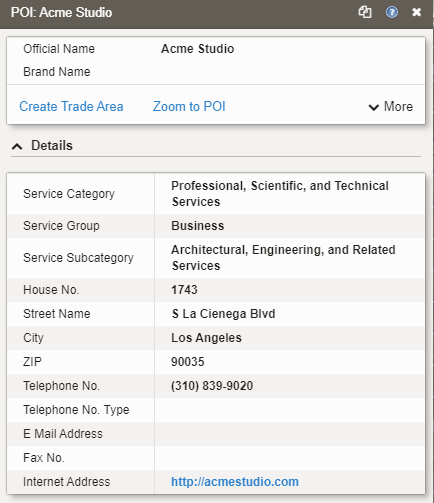
- The Location Information Panel provides detailed information on the selected POI as well as useful and search commands.
|
|
Using and Styling the Points of Interest Layer
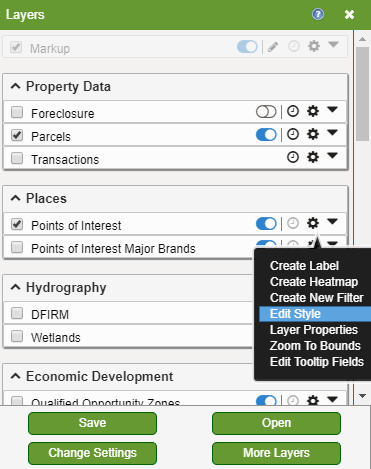
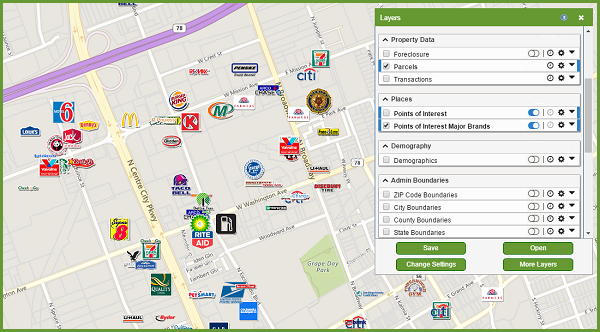
- Turn on the Points of Interest layer by clicking on the layer checkbox in the Layers Panel.
- Click the Layer Options icon
 next to the Points of Interest layer. next to the Points of Interest layer.
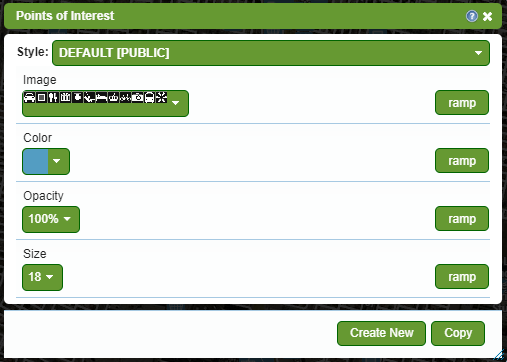
- Click Edit Style from the menu to open the Style Editor.
|
|
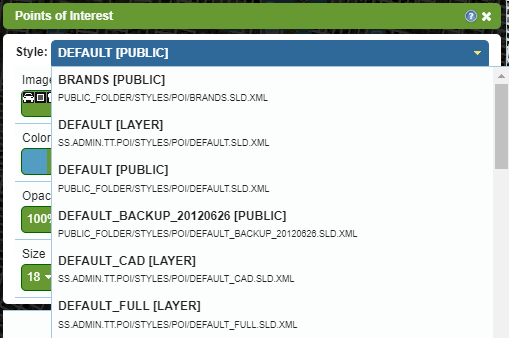
- Click the Style drop-down list to select a style (See Styling Your Map in Related Documents for information about styling data).
Tip: The Image, Color, Opacity, and Size fields can be used to manually make styling changes of your own which you can save.
|
|
POI Major Brands Layer
- Turn on the Points of Interest Major Brands layer by clicking on the layer checkbox in the Layers Panel.
- Turn on the tooltip to help identify the retailer, and access any of the commands from the Location Information Panel.
|
|
Related Documents
| | |
